It seems as though the temperature shot from average mid 70’s to high 80’s in about a minute this year. It is already warming up and school is almost over. Summer is approaching the runway.
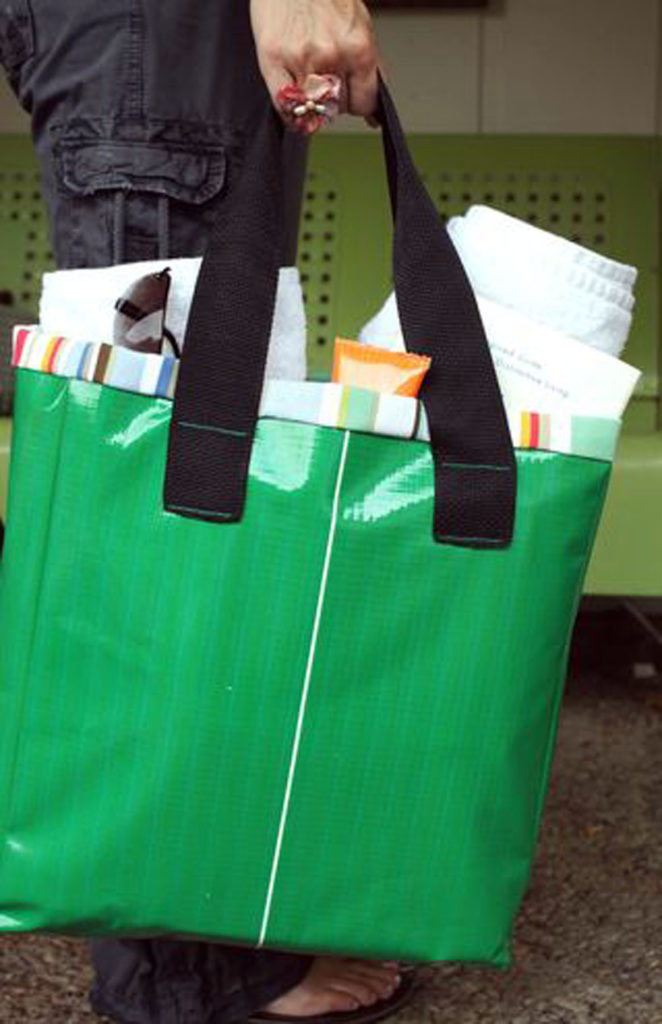
Around here, that means many trips to the beach and hanging by the pool. Tote bags are great (my wife never met one she didn’t like). Having one to carry all of the stuff along makes life so much easier. As our kids have gotten older we carry less stuff, but the need still exists. Today we offer up a quick and easy bag that you could make in about an hour. The best thing about it is that it reuses materials that would likely end up in a landfill.
Our bag exterior is made of vinyl ripstop fabric. It is the material used in many commercial banners. This particular banner came from a bank that recently folded. If you cannot find this material you could also use a tarp. Because it is meant to be put outside it is perfect for the beach or pool. It is stiff enough to stand on its own but soft enough to squeeze in tight spots in the trunk.
savour… adult swim
Before you start:
The objective here was to make a bag with re-use materials and make it splashproof. This pattern could be applied to other more traditional fabrics, but you may need to attach some semi-rigid interfacing to the exterior fabric.
The interior pocket is perfect for stowing phone, keys, and wallet. This will save you much time and frustration digging around the bottom of the bag.
There are many patterns out there for tote bags. This is just one method that is relatively quick and easy and produces good results.
As in previous sewing projects, I will always use 1/2 seam allowance unless otherwise stated. It keeps the math simple.
I melted the ends of the nylon straps with a lighter. You can double it over and stitch it if you wish.
The materials:
- Vinyl fabric (ours is ripstop sign material)
- Matching thread
- Liner fabric (we chose a sturdy cotton, almost canvas type with a summer-y stripe pattern)
- Nylon strapping
- Upholstery webbing or other sturdy backer as reinforcement
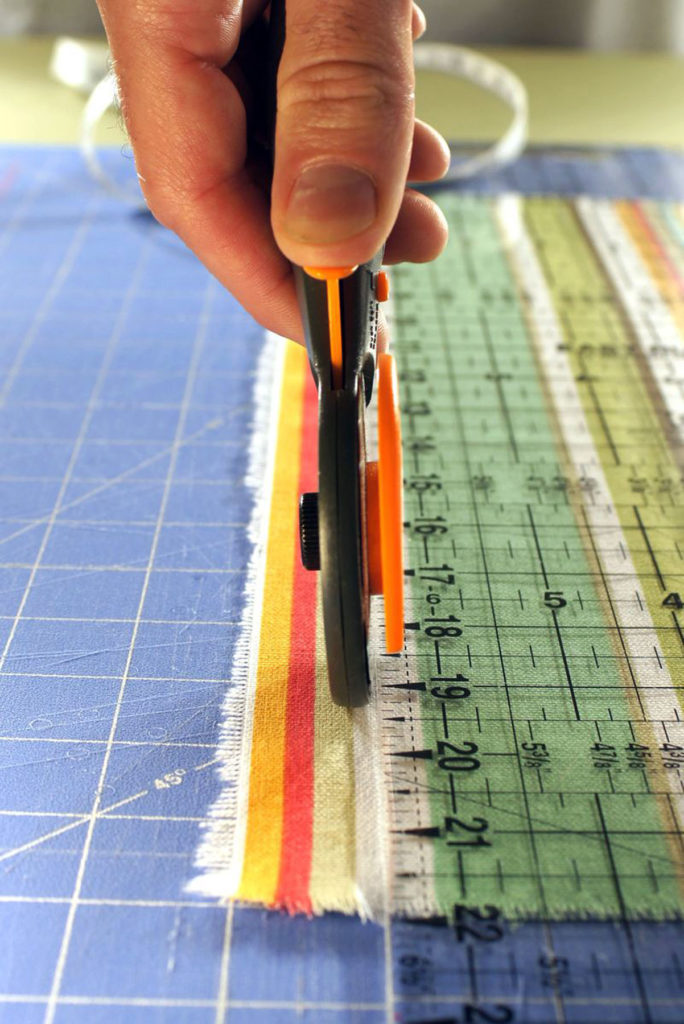
- Rotary cutter or scissors
- Sewing machine
- Pins
- Ruler
The method:
To assemble the handles follow instructions below:
- Using the attached template make your cuts.
- Fold the nylon strap in half lengthwise.
- Measure out 6 inches in the center of the strap. Mark either end of the 6 inches with a pin.
- Sew from one pin to the other about 1/4 inch from the edge. Be sure to backstitch at the start and finish to secure.
- Along the shortest edge of the large cut for the bag exterior measure, 3 inches right and left from the center. Mark those two spots with a pin.
- On the outside of those marks attach the reinforcement fabric on the backside and the nylon strap on the front side of the bag with a pin. The bottom of both pieces should be 3.5 inches from the top of the bag.
- Sew two lines for each strap. One should be about 1/4 inch from the bottom of the strap. The other should be about 2 inches higher than that.
- Repeat on the other end of that cut.
To assemble the outside follow instructions below:
- Place one of the side pieces right side to the right side against the large exterior cut. This should be lined up on one of the sides.
- Sew this piece in place leaving about 1/2 inch at the bottom of the side piece being attached.
- Repeat on the other side.
- Wrap the remainder of the long cut around the side pieces and pin. You should have what looks like the beginnings of the bag turned inside out.
- Sew this all together. You may want to make diagonal cuts from the point inward (1/2 inch) at the corners to make it easier on yourself to sew.
- When you are done turn it right side out.
To assemble the inside follow instuctions below:
- On the tallest edge of the pocket, cut create a double fold 1/2 hem and sew.
- Press a 1/2 fold on the other 3 sides of the pocket cut.
- Attach the pocket to the very center of the large interior cut of fabric.
- Fold the large piece onto itself right side to right side.
- Sew open edge creating a tube.
To attach inside to outside follow instructions below:
- Slide tube over the assembled exterior, match the edges up, and secure with pins.
- Sew the liner to the exterior.
- Turn liner right side out, but do not tuck into the exterior.
- Match corner up from bottom cut to the bottom of the bag and attach to open part of the tube with pins.
- Sew all the way around the edges and backstitch at the end.
- Keep the hem from fraying by zig-zag stitching over the seam allowance. You could also cover the seam allowance with ribbon or trim and sew in place.
- Push the liner into the exterior.