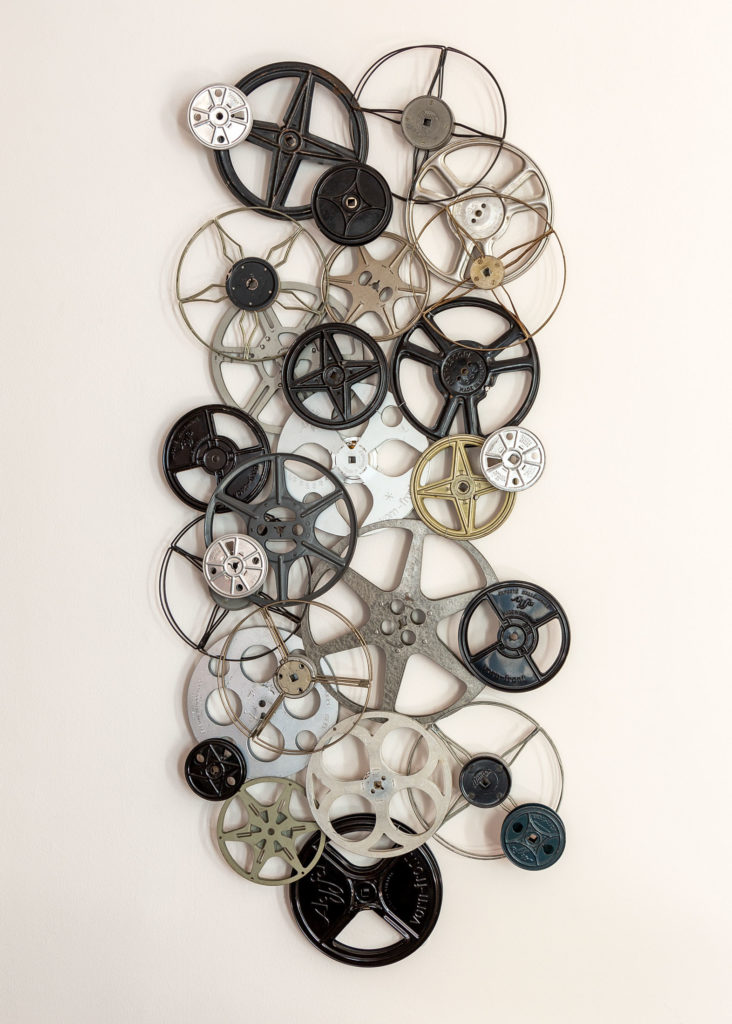
Finding unique artwork that really captures your personality can be difficult. It is even more difficult to find a piece that fits exactly where you want it to go and fills the space appropriately. For many, this wall art from vintage film reels solves both problems.
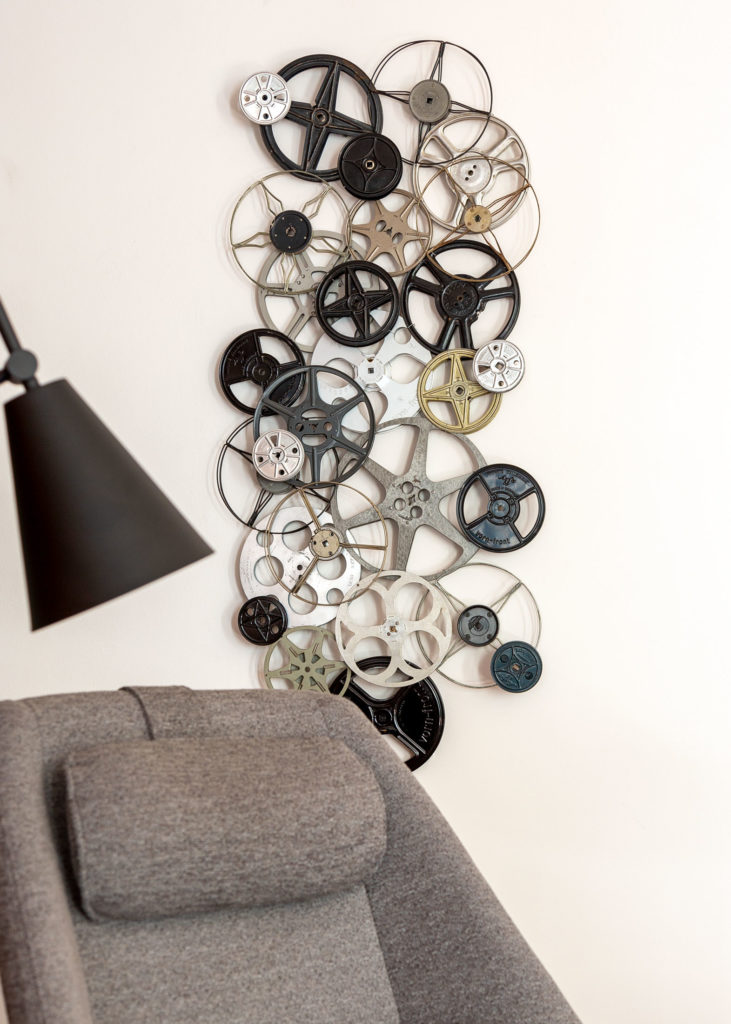
By pairing your passion with a little creativity you can have artwork that is truly one-of-a-kind and is custom-made for wherever you want it to go. If you are a film lover, this project is perfect for you. It combines a vintage look with graphic shapes and modern sensibility. It would be suitable for just about any room, but it would be especially good in a space meant for entertainment.
savour… the collective good
WALL ART FROM VINTAGE FILM REELS
Before you start:
A quick internet search will reveal some resources for finding the old film reels. We recommend starting at a place like eBay where you can search for a ‘lot’ of film reels. A win here would significantly reduce the need for searching and tracking several shipments. However, there are certainly other internet resources. Beyond that, check with local second-hand stores and antique shops.
Buy more reels than you think you will need. You may decide that your design needs more density or depth. If you have extras you can always use them for other projects.
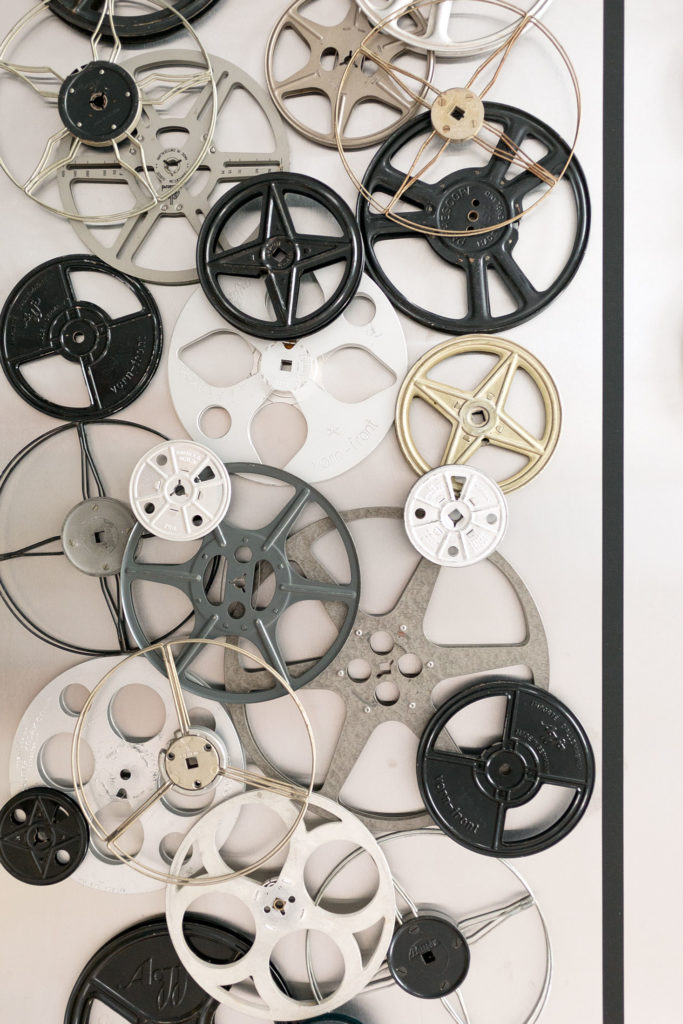
The design is up to you. You could create something very graphic and cool with reels of the same size and color. To create a look similar to our project, you will need a variety of reels of different style, color, and size.
Think 3D… beyond filling the space vertically and horizontally, think of how the art will protrude into the space. Layer the reels to give the project some dimension.
It is crucial that you test it vertically to determine where to install nails. When you hold the finished design up, some pieces will naturally shift slightly due to gravity.
Love upcycled projects? Be sure to check out our Galvanized Pipe Vase and Tow Rope Bench Redux.
The materials:
- masking tape
- measuring tape
- variety of vintage film reels
- medium gauge wire
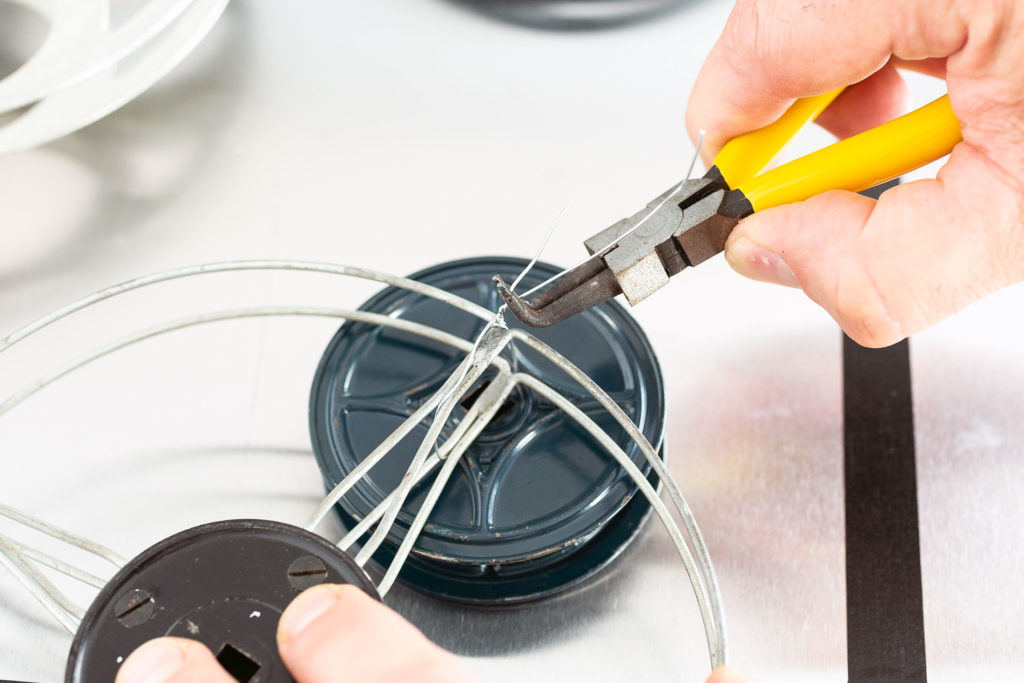
- wire cutters
- pliers
- pencil
- nails
- hammer
The method:
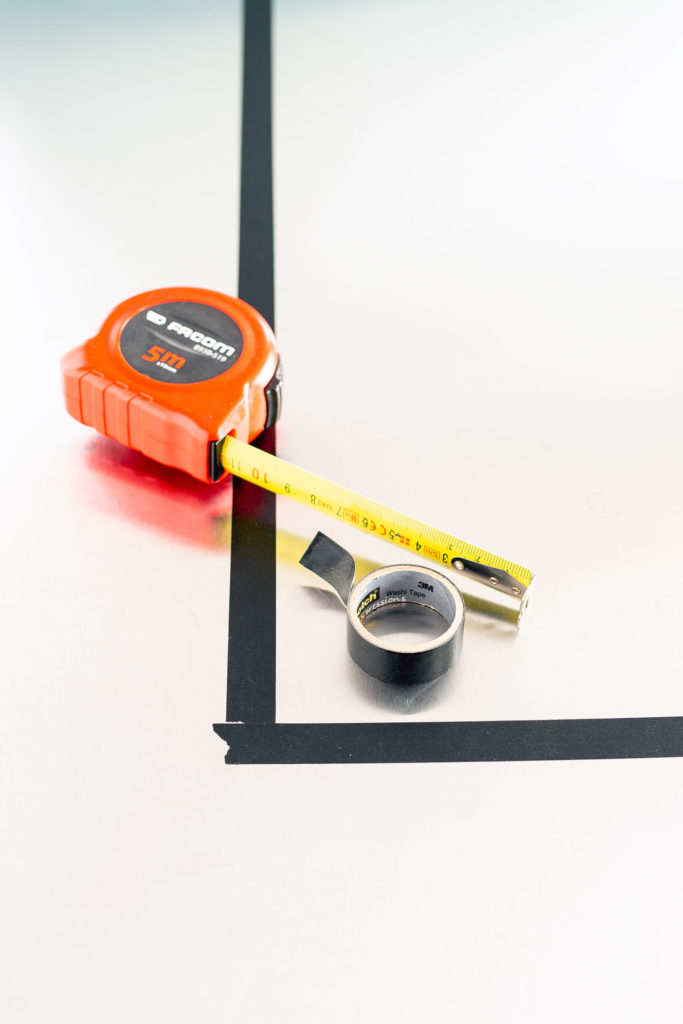
1. Create the plan for the film reels wall art by measuring the space you want to fill with the reels. Use those measurements to tape off space on a flat surface, such as a table or the floor, that will serve as the boundaries as you make your design.
2. Starting with the largest reels, arrange them randomly throughout the space. Distribute the colors and styles in a balanced way. Overlap some of the edges. Fill in with medium-sized reels, if necessary. Next, add some of the medium-sized reels as a second layer in a similarly random manner. Finish by adding small reels to fill in obvious gaps on the second layer and create a third layer adding them to points where some balance of weight or color is needed.
3. Stand back from your design and check for areas that need to be adjusted for balance in color, shape, or proportion. Make the necessary adjustments. When you are satisfied with your design take a photo of it for reference.
4. Remove the third and second layers. If possible, place them in a similar order as they were on the design so it will be easier to remember where they belong.
5. Cut many small pieces of wire (about 3 inches). Rotate the reels as needed to line up overlapping edges so that wire can be wrapped around them. They will not likely be all the same thickness, which may require you to make some slight adjustments to your original design. Wrap a piece of wire around the edges of two overlapping reels and twist the ends tightly with pliers as close to the backside of the reels as possible. Cut the excess wire, leaving about ¼” intact. Fold the ¼” tail to the back of the reels to hide it.
6. Continue connecting reels to build the first layer. It is best to have at least two connections for each reel, three would be ideal. Next, proceed to the second and third layers. Use your photo as a reference to complete your design.
7. When the design is complete, have someone hold it in place while you mark spots on the wall for nails to hang it. Look for spots where the first layer comes in direct contact with the wall and where there is a hole cut in the reel. Hang in place.