
One of the best things about summer coming to a close is that I know we will begin to spend more time outdoors. Since it will begin to get dark earlier, I wanted to come up with an attractive lighting solution for our tree-lined seating area in the back yard.
What we have come up with is one of a kind solution that could have other applications even inside. This mason jar light is quaint and reminds me of a jar of fireflies. Dangling from the branches, they add just enough ambient light to put some glow on your cheeks and sparkle in your eyes… perfect for an evening conversation and glass of wine.
savour… evening chats
MASON JAR OUTDOOR LIGHTS

Before you start:
If you need help, ask for it. Working with lighting is easier than most people think, but electricity can be dangerous. Let caution be your guide.
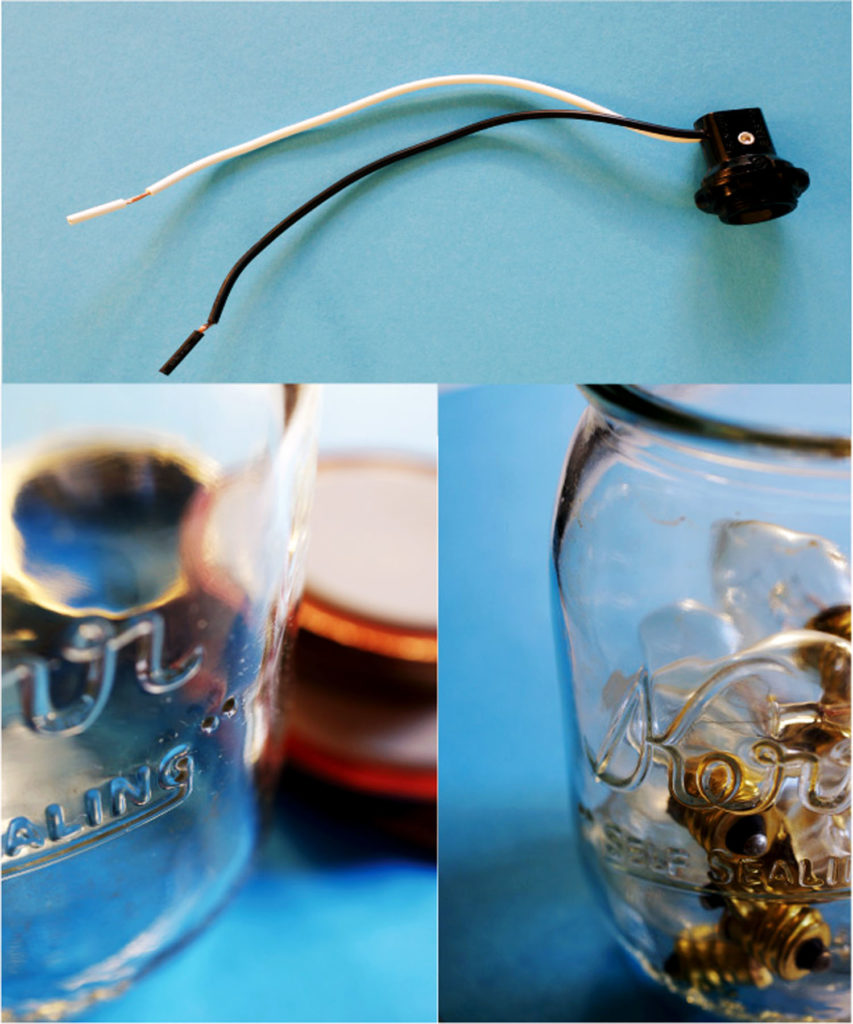
Be sure to get the candelabra socket kits with the securing nut. This will pay off in the end.
If you did not find white it is fine. Just be sure to connect black to black throughout the entire project and whatever other color to white for the entire project. It must stay consistent.
If you will be leaving the lights outside you may wish to place a bead of silicone caulk between the socket and lid and also between the lid and ring. This will prevent any water from getting inside.
Wrapping the mainline with twine is time-consuming. You may be tempted to skip it, but don’t. Executing this step will produce a far superior finished project. Do it while watching TV to make it easier on you.
What you will need:
- 12 Jars w/lids and rings
- Black marker
- 12 candelabra socket kits
- 12 7W night light bulbs
- Plenty of electrical wire (two colors, black and white would be best)
- Connectors
- Needle nose wire cutters
- Electrical tape
- Scissors
- Clear silicone caulk (optional)
- Flathead screwdriver
- Hammer
- Block of wood
- Twine
- Household extension cord

The method:
- Using the nut of the candelabra socket kit, draw a circle in the center of each of the lids using the inside of the nut as your guide.
- With a block of wood underneath, use the screwdriver and knife to “chisel” out the circle. Go around the outside edge of the drawn circle.
- After you have popped the circle out, use the side of the screwdriver to push any rough edges inward on the lid.
- Push the socket through the hole in the lid and secure it with the nut. Repeat for all.
- Put the lid ring on now.
- With the twine, tie a knot at the base of the socket and start winding the twine around the wires. Stop every inch or two to push what you have wrapped downward to make it tightly wound. When you get about an inch away from the end stop and temporarily secure with a clothespin or scotch tape. Repeat for all.
- Cut the wire into 3-foot lengths (12 of them for each color). We’ll call this the mainline.
- Remove about ½ inch of coating from each end of the mainline wires.
- If you skipped step 5, do it now. There won’t be any turning back once you start connecting and wrapping with twine.
- Slide a connector onto the end of each wire of the socket. Connect one of the mainline wires to each of the socket wires with corresponding colors. Twist the ends together and slide connector over the connection. Crimp the ends.
- For all but the first, one you will need to connect the socket wire, the mainline coming from the last socket wire, and the mainline going to the next socket wire.
- After each socket wire is connected, take the time to wrap the mainline with twine.
- Wrap the loose end of the socket wire over the connection. Wrap the twine on the mainline over the connection and include the loose end of twine that is wrapped around the socket wire.
- Stop about ½ before the next connection and temporarily secure with a clothespin or scotch tape while you make the next connection. Repeat step 13.
- Cut the outlet portion of the household extension cord off so you are left with the plug at one end and exposed wires at the opposite end. Remove ½ of the coating.
- Connect the extension cord to the last mainline wires and wrap with twine.
- Screw-in bulbs and secure lids to jars.
- Plug it in and verify that all lights are working.
- Hang outside on the patio or in trees using extra twine or wire.


