
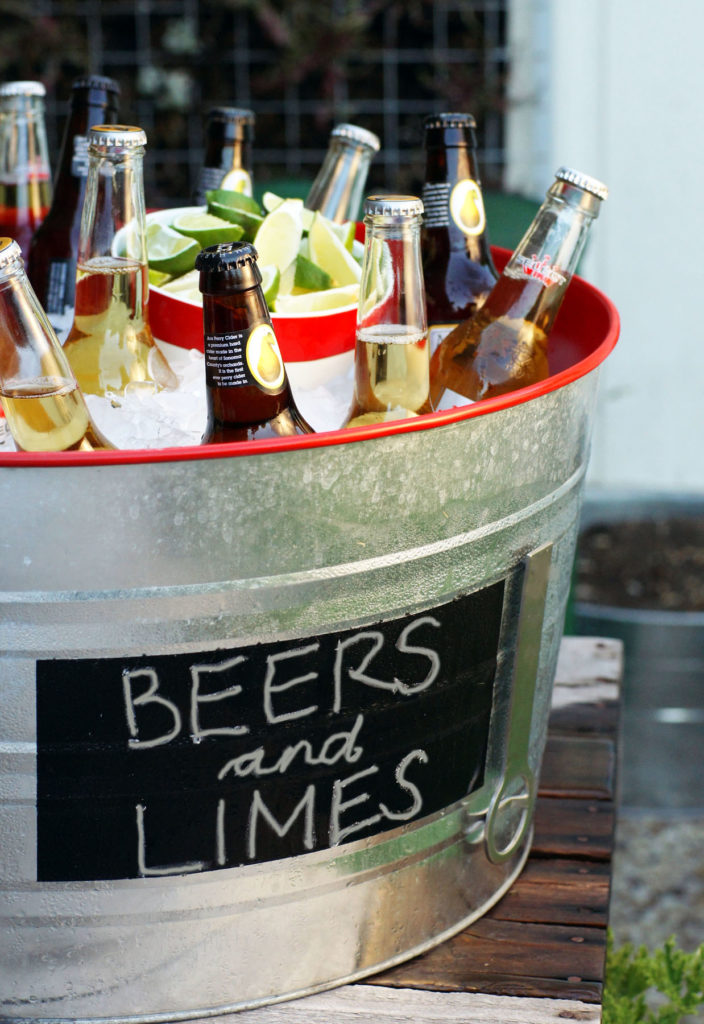
This week we are bringing you a few summer patio projects. The first was inspired by a trip to our local big-box discount store. We spotted metal drink buckets painted summer colors. The buckets were not as sturdy as we would like and the handles were poorly made. They had no drainage and the price was $20.
Armed with the idea, we headed home to get busy. We had a bucket already which cost less than $10. We picked up some spray paint for the inside, but everything else we had on hand. We made a few minor improvements and ended up with something very useful.
savour… cracking a cold one
BEER BUCKET DIY
Before you start:
Choose good quality spray paint.
We chose not to paint the entire bucket, but you certainly could. I like the idea of showing what it truly is with just a hint of color.
Our bucket has been around a while so it wasn’t shiny and new. If yours is, you may wish to lightly sand the areas to be painted to give the paint something to grab.
Make sure the bucket is completely dry before starting to paint.
Buckets typically have bands around them that are raised. You will find it easiest to use these as your guide for making the rectangle on the outside.
The materials:
- Large galvanized bucket
- Drill and bit
- Spray paint for inside
- Chalkboard paint
- Masking tape
- Newpaper
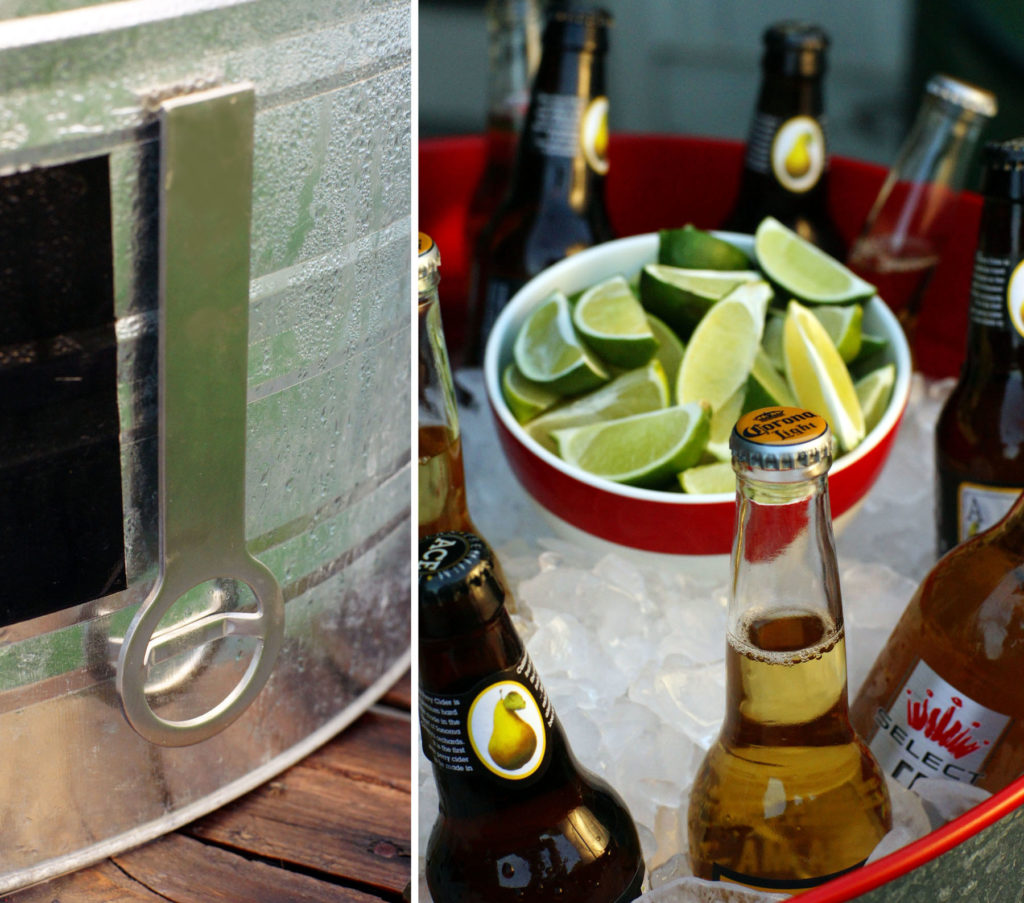
- Flat bottle opener
- Super strong ‘bullet’ magnet
- Gorilla glue
The steps:
- Clean and dry the bucket.
- Drill a series of holes in the bottom with a drill and bit at least ¼ inch in diameter.
- Clean out any metal scraps from drilling.
- Tear a piece of newspaper in half and run a strip of masking tape along the longest edge.
- Wrap the paper around the outside of the bucket with the tape under the rolled edge.
- Continue around the bucket with more pieces of newspaper until completely covered.
- Spray paint the inside of the bucket following the paint maker’s instructions. You should apply several coats.
- Allow to dry completely before using.
- Remove the newspaper.
- Make four more masks by tearing a sheet of newspaper in half and in half again.
- Run tape along the longest edge.
- Use these four sheets to make a large rectangle on the front of the bucket.
- Spray with chalkboard paint following the paint maker’s instructions.
- Remove the mask when completely dry.
- Attach a magnet to the back of a flat bottle opener with Gorilla glue.


