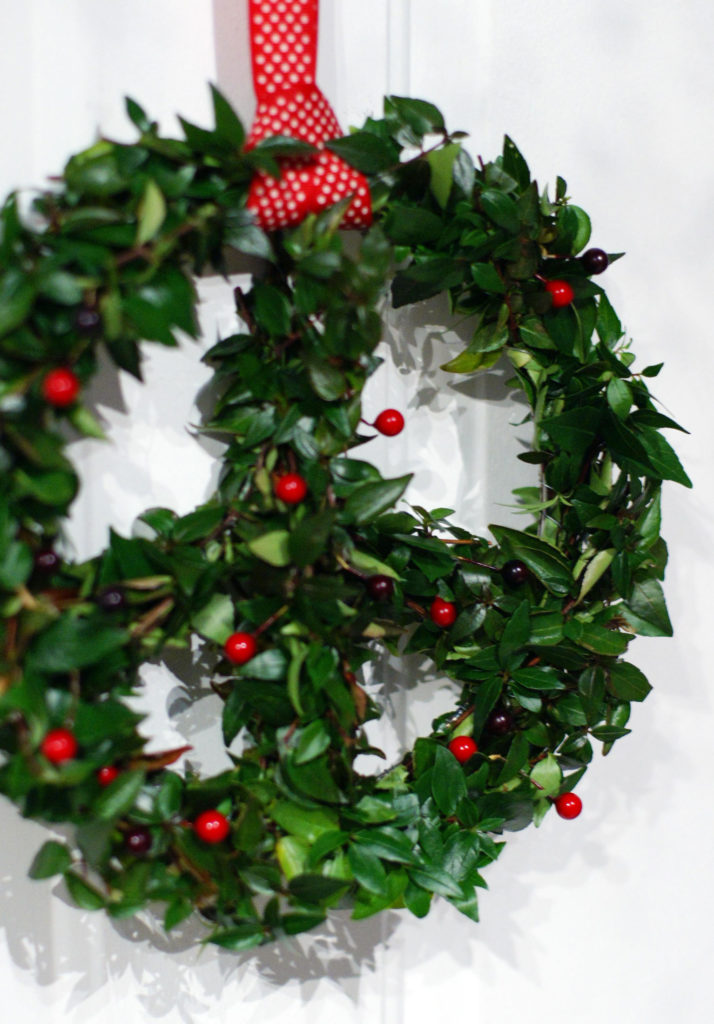
Our holiday adventure inspired our craft this week. This simple holiday wreath adds to the season and drives home a message of peace. It will be perfect for your front door or given as a gift of peace to a friend or neighbor.
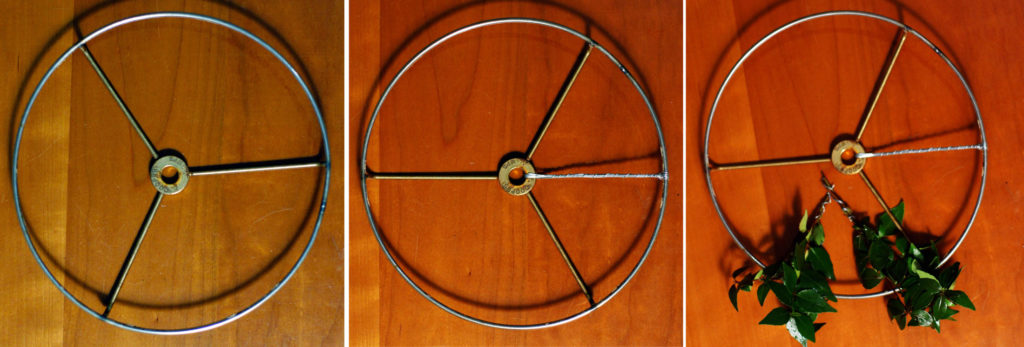
Making living wreaths is far easier than you might have imagined. Craft stores sell plenty of materials, but you will find what you need for our wreath at your local thrift store… or maybe in your garage or attic. We are using a lampshade frame as the base for our peace wreath.
savour… joy and peace
LIVING PEACE WREATH
Before you start:
Take materials from your own yard while respecting the balance of nature, but refrain from taking natural materials from parks and preserves. Generally, it is frowned upon and in some cases it is illegal.
Alternatively, many tree farms and vendors sell scraps very inexpensively or even give them away.
Think beyond traditional. Your wreath might be made from trimmings of your own shrubs.
Be cautious with branches that have berries. Fallen berries in your home that may be picked up by small children or pets could be potentially harmful.
Our berries are artificial from a craft store. They are on a wire which makes them easy to manage.
Caring for your wreath is simple. Keep a spray bottle with just water handy throughout the holiday season. Spray the wreath completely (front & back) each day.
The materials:
- Lampshade
- Medium gauge wire
- Wire cutters
- Plenty of greenery
- Pruning shears
- Ribbon to hang
The steps:
- Deconstruct the lampshade to reveal just the rings.
- Wrap several passes of wire through the center hole of the upper ring and halfway between two of the three spokes leaving a length of wire that is 1 ½ times the length hanging.
- Wind the loose end of the wire around the wire spoke that you have created to reinforce it.
- Cut the greenery into equal lengths (approximately 6 inches).
- Hold 3 or 4 lengths firmly in your hand while you wrap wire around the stem end to secure. Twist the end to hold.
- Make several bundles of just 2 or 3 lengths (approximately 4 inches) to cover the spokes.
- Starting with the left side of the 3 bottom spokes attach one of the small bundles so that the tip of the foliage hangs over the edge of the ring about 1 inch. The stem end should be pointed toward the top of the wreath.
- Continue adding small bundles and overlapping until you reach the center of the wreath.
- Repeat steps 6 through 8 on the right side of the bottom three spokes.
- Begin the center spoke in the same way, but continue beyond the center point and all the way to the top of the wreath. Curve ends to the right and secure when you reach the top.
- Begin attaching the bigger bundles at the top and work your way around clockwise overlapping 3 or four inches all the way around the ring.
- The last bundle or two will have to be inserted under the first bundle.
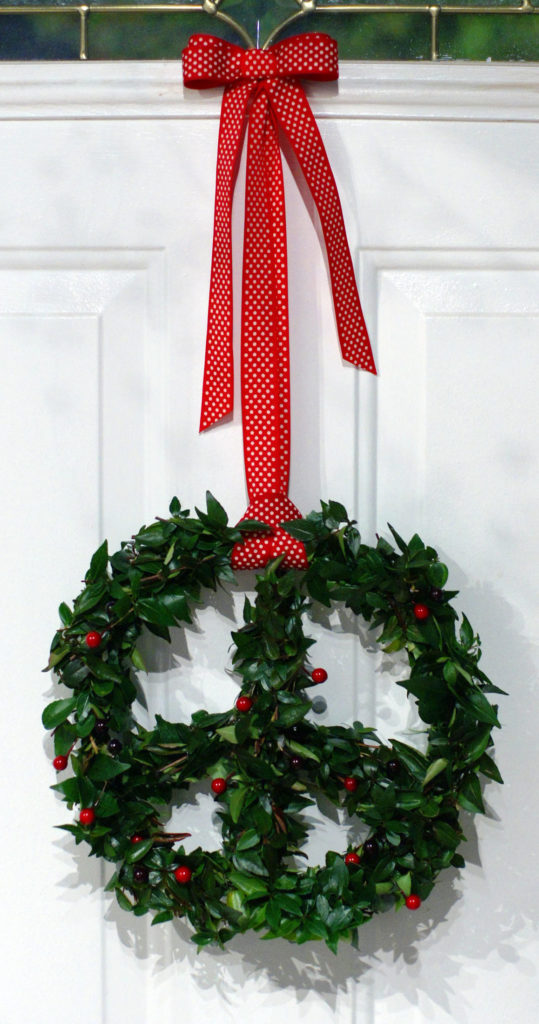
- Attach your ribbon by making a loop and feeding the ends on either side of the center spoke.
- Tie a knot at the top of the two ends of the ribbon to determine the length of your hanger. Make a bow separately and attach it with a ribbon to cover the knot.