
Simple crafts are the best crafts. This one is so easy to do and each one costs under $3.50. A trip to the thrift shop and dollar store yielded everything I needed to complete this budget decor project, upcycled sweater hurricane wraps, which will be part of an upcoming cozy fall decorating article for HGTV. If you have an old sweater kicking around you can do it for even less.
The “hurricanes” (or in this case, standard-issue vases) were 99 cents each at the thrift store. The sweater, which was $2.99, adds just the right amount of fall color and softness to drive the message home. Best of all, the sweater wraps can be switched out for something more holiday-inspired in a couple of months.
There is very little sewing involved here and even knowing the most basic stitch will do. I was done with the entire project in less than 30 minutes.
savour… simply cute
UPCYCLED SWEATER HURRICANE WRAPS
Before you start:
The sweater in the example was a very tight knit and unraveled very little at the cut edge, which has been folded over. If the knit of your sweater is loose and you are concerned about it falling to pieces, sew a length of ribbon all the way around the sleeve just below where you will cut it. Then trim away the excess. It doesn’t matter if you sew it on the inside or outside of the sleeve if you fold it over.
Consider the size of the sweater sleeve in relationship to your vase. You want it to be snug enough to stay up on its own, but not be stretched too much. Smaller vases may require a kid’s sweater.
The materials:
- vase (straight sides, cylindrical or rectangular work best)
- sweater
- scissors
- pins
- needle and thread
- pillar candle
The method:
- Cut the sleeve from the sweater at the seam where it connects with the body. Turn it inside out.
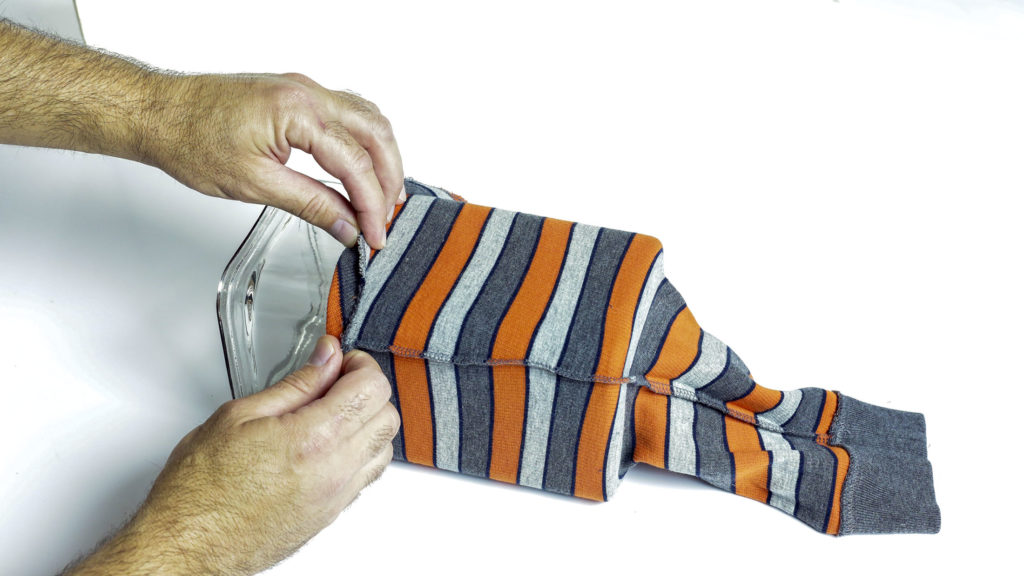
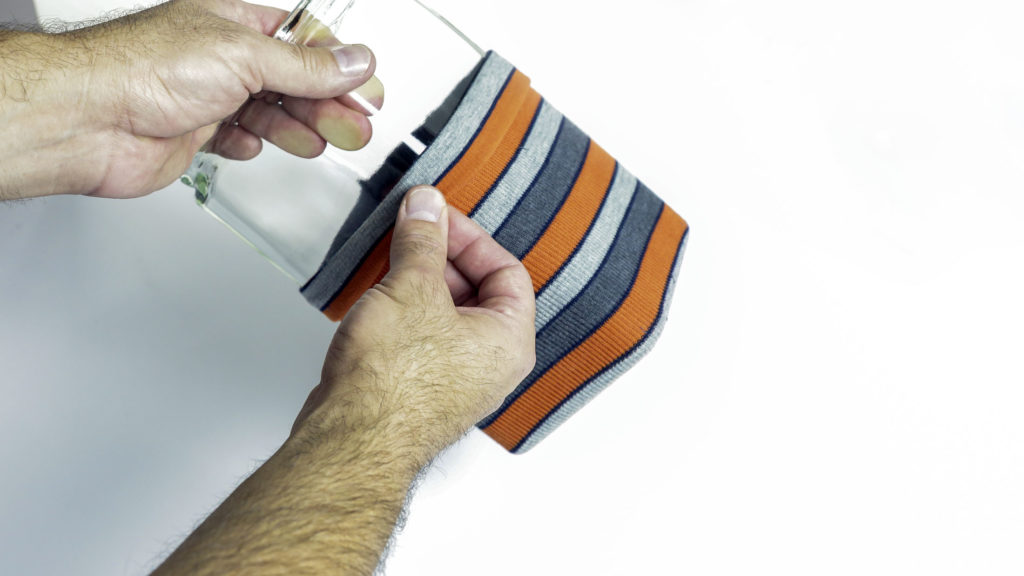
- Slide the cut sleeve, inside out, over a clean vase until it fits snugly at the bottom. If there is a pattern, make sure it is lined up properly at the bottom of the vase. Trim away the uneven part of the sleeve at the top of the vase.
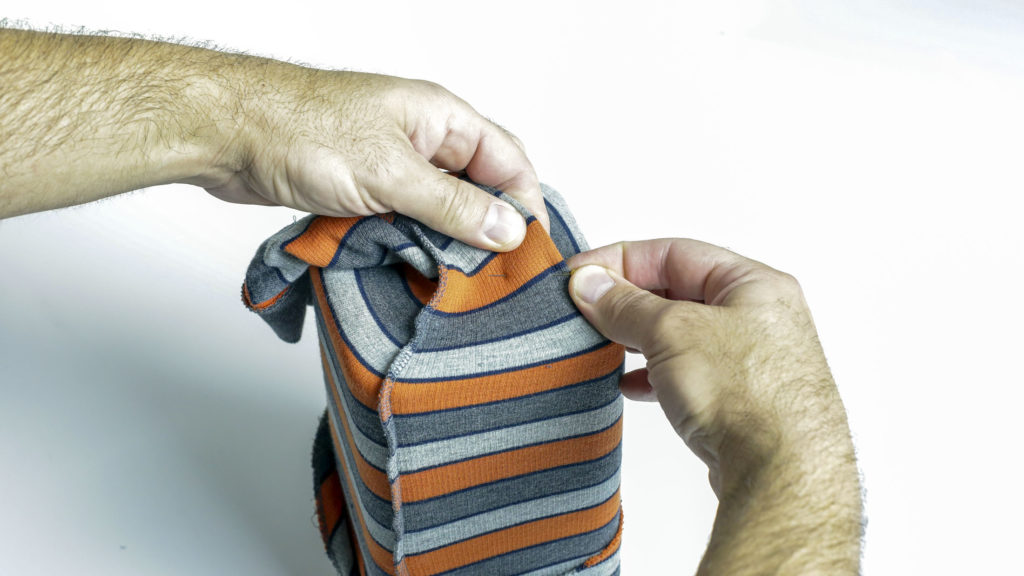
- Place the vase top down on a flat surface. Hold the cuff end of the sleeve up and pinch the fabric together at one of the corners as close to the bottom of the vase as possible. Pin the fabric from the corner to the center of the bottom of the vase. Repeat for the other corners creating an ‘X’.
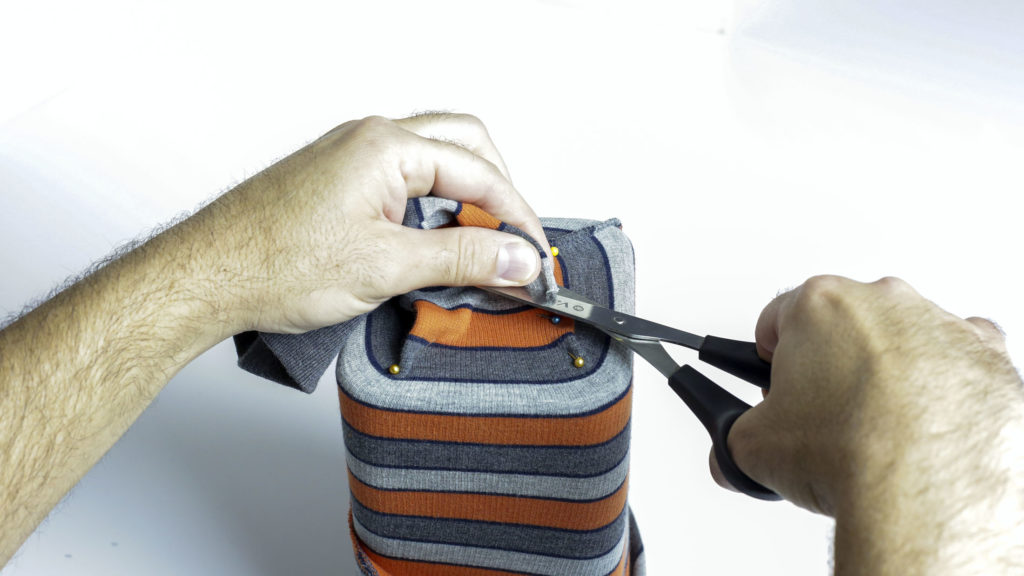
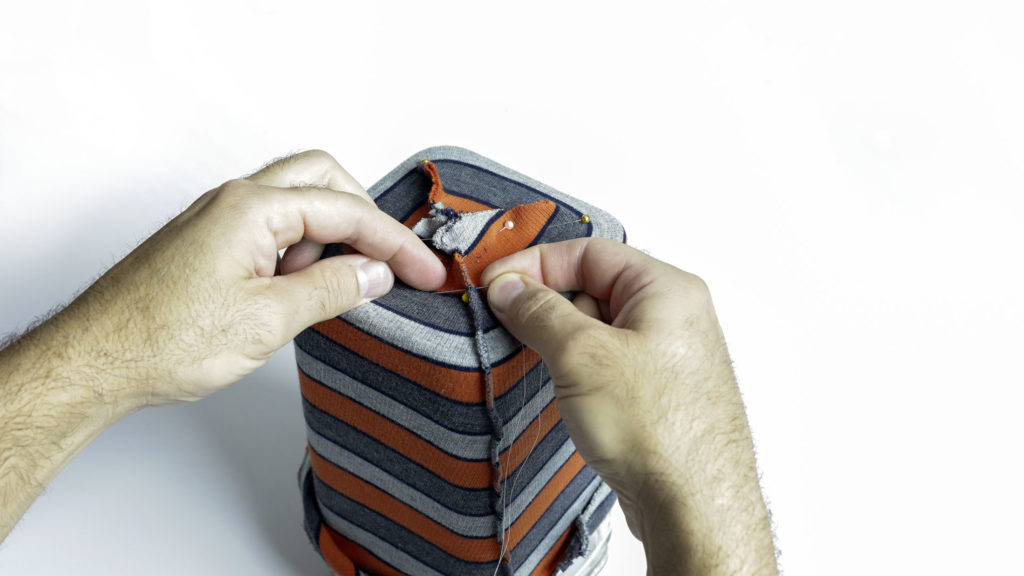
- Trim away the excess sleeve leaving about ¼” to ½” of fabric for seam allowance. Use needle and thread to hand stitch from one corner to the opposite corner tying off at both ends. Repeat for the other two corners. Trim away loose threads and remove pins.
- Remove the wrap and turn it right side out. Slide it back over the vase and fold down the top of the wrap twice (about 1″ each time). Insert a pillar candle.


