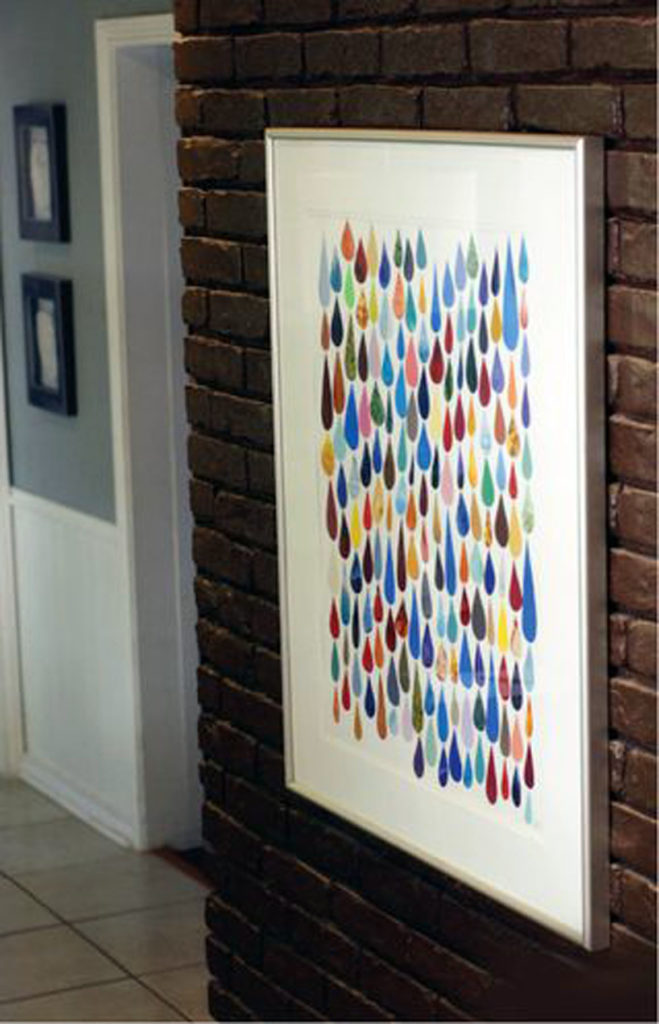
The inspiration for my project today is here. I first saw this Rex Ray print years ago in a magazine that I cannot remember. I found a picture of it online and bookmarked it knowing that I would use it for inspiration someday. I love the graphic quality of this piece and the use of colors and shapes.
I believe that the Rex Ray version is digital art. We could do that, but that would depend on you having the software and skillset to complete the project. I have opted instead for a version of the inspiration art that anyone should be able to do. All of the raindrop cutting can be done while watching TV.
We will be using some of the images that you may have already started saving based on last week’s paper art project and a new cheap paper source… paint chips. Those little cards at the home improvement center are perfect for a project like this. I have amassed hundreds of them over the years. I spend a great deal of time at hardware stores.
I had a frame from a tag sale that had a horrific 80’s pastel print in it. The glass and the mat were in very good condition, though, and I used the back of the print as my background since I knew it would fit perfectly. The instructions follow. Please send me pictures of your results.
savour… self-made masterpieces
SUN SHOWER PAPER ART
Before you start:
You should cut out more raindrops than you think you will need. It is good to have choices when one does not fit quite the way you thought it would.
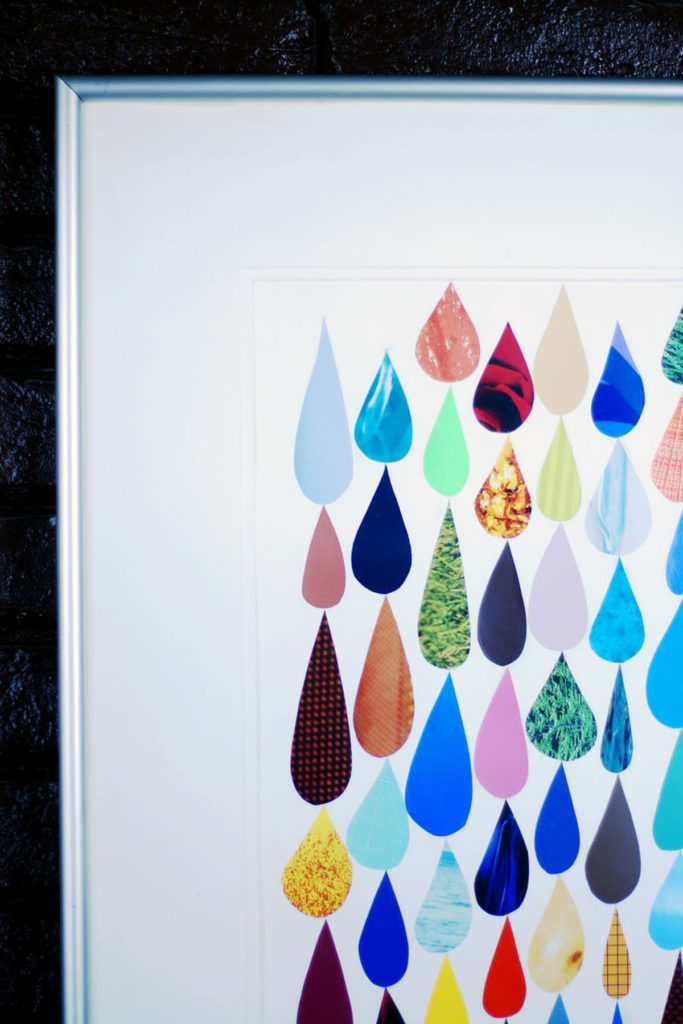
Pick papers and paint chips of varying color, texture, and sheen. This will add an extra layer of dimension to your piece.
The shapes are meant to be very organic. They only need to resemble raindrops. Don’t take it too seriously.
Materials:
- Frame and mat
- T square
- Yard stick or straight edge
- Craft glue (like Mod Podge)
- Small squared off artists paint brush
- Eraser
The steps:
- Cut many “drops” out of the paint chips and clippings.
- Use the mat to outline space to fill with art. I put it on the paper I used as the background and just drew a light line in the corners to set my boundaries.
- Remove the mat and store it carefully.
- Layout drops in the desired pattern on a separate surface.
- Begin assembling the artwork by using the T square to draw a line up the center of the paper
- Paint a little glue on the back of the first drop.
- Place the first drop at the top of the line within the boundaries you have drawn (the tip of the drop should be on the line).
- Continue placing the drops down the line with the tip butted up against the bottom of the last drop. Each tip is placed directly on the line to ensure that when you are done no lines are showing.
- When you are finished with the first row begin the next by laying the drops out the way you expect them to be. Move them around as necessary to make sure they are slightly staggered in contrast to the line you’ve just glued down.
- When you have them where you want them, draw a small horizontal line at the top of the top drop to indicate where to start.
- Lay the T square down in line with the tips. Draw a line from the bottom of the paper to the bottom of the lowest drop.
- Move the drops to the side.
- Using the yardstick, continue the line you made with the T square up the rest of the paper.
- Again starting from the top, apply glue to the back of each drop and place on the line at the mark you made previously.
- Continue line after line until you have filled the space.
- Erase the lines that you drew with the T square from the bottom of the paper to the bottom of the lowest drop.
- Replace the mat and frame.