There is much debate over whether to use a gas grill or charcoal grill. Some even suggest that a gas grill is for grilling, but that to be called barbecue a charcoal grill must be used. We won’t even attempt to resolve any of those issues here. What I can tell you is that many of the same principles apply to both, but there will be slightly more charcoal grill information here. Let’s face it, there isn’t much to learn about turning on the gas knob.
Here is the #1 most important thing to know about barbecuing – Planning and preparation is the key to any successful barbecue. Now, that is a loaded statement, but could not be more true. Once you have mastered planning and prepping the food, time, and tools you will be well down the road to success.
The most important thing for you to plan is time. There is a certain amount of lead time associated with charcoal grilling (gas grills will obviously require less time upfront). Next, you must plan the necessary cooking times for each item you will be cooking. Start by adding up all of the minutes and then take that time off of the expected mealtime. Do yourself a favor… add about 10-15 minutes. Something always happens and the worst thing that could result from the added time is that the meat has to rest for a few minutes before being eaten. That is actually a good thing.
You will need to have prepared the food in advance. Depending on how you plan to treat the food you may have to place it in a marinade the night before or at the very least several hours before. You will also need to have the rubs, sauces, and marinades on hand for the actual grill.
You will need to have your tools clean and ready. The last thing you want is to reach for the spatula and realize that you’ve left it inside the house. Grilling often requires careful attention and running around looking for your tools could end with tragic results.
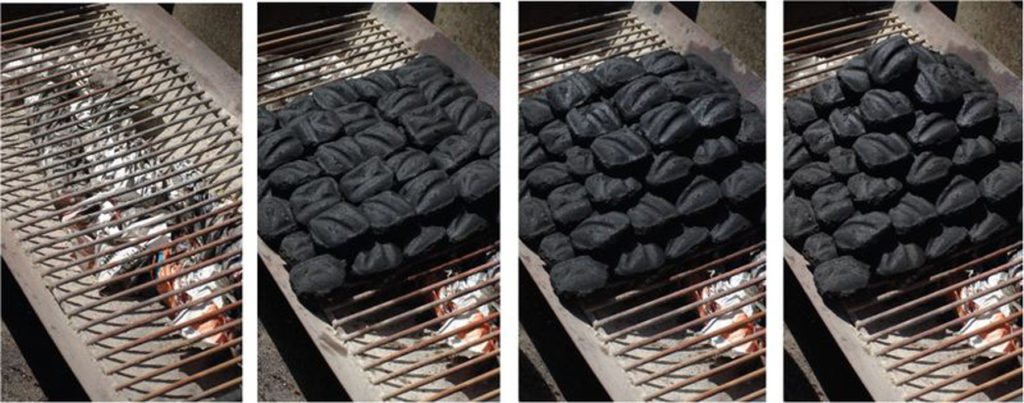
So now you have everything together and you need to get the heat on. Gas grill users can just follow the instructions for their grill and turn on the flames. Charcoal grillers will have a few extra steps, but they are simple once you learn them and following the rules consistently always produces good results. Many people use a charcoal chimney with success. Here we will outline how to get your coals started using the tried and true pyramid method. It has worked for me for many, many years. I’m sure you will find it successful on the very first attempt, as well.
savour… blackened dogs
To start charcoals:
- Roll up three or four sheets of newspaper.
- Rub a little cooking oil on them. This will prolong the burning.
- Place the oiled paper under the charcoal grate (leave enough extended beyond where the pyramid will be to light).
- Make a single layer of briquettes as wide as it is long (I can fit 6×6 on my grate).
- Add another layer on top of that. It should be one less in both directions.
- Pour on some lighter fluid.
- Add two more layers decreasing the number of briquettes for each layer.
- Pour on more lighter fluid (just the two new layers).
- Add the last two layers.
- Add just a little more fluid.
- Allow it to rest for at least 20 minutes (this part is critical to make sure that the fluid soaks in).
- Light the paper underneath.
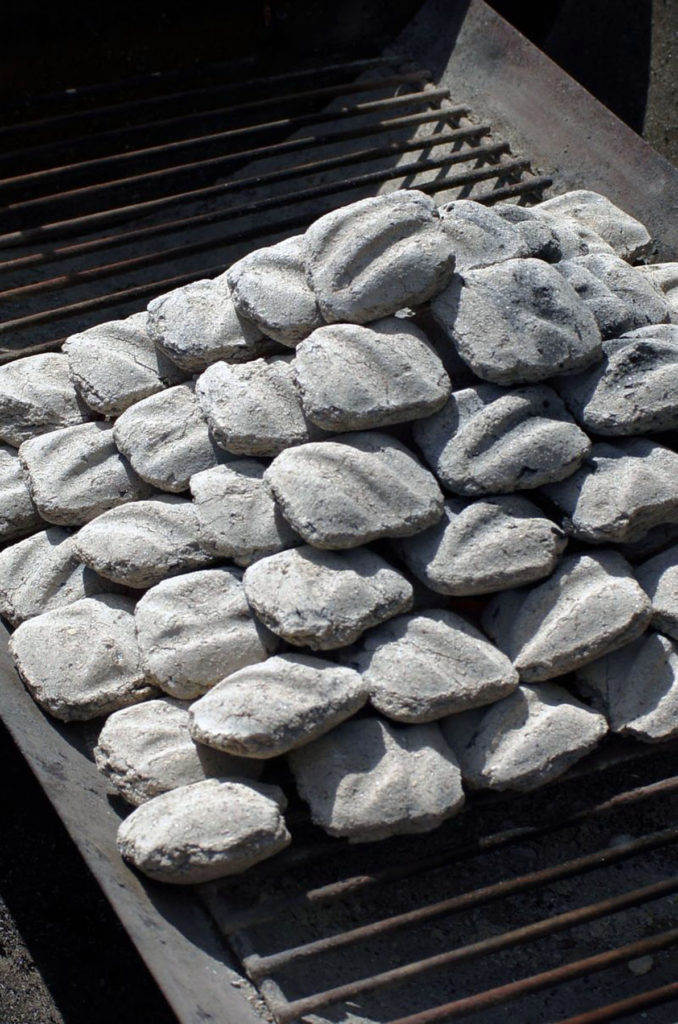
- Allow coals to burn for at least 20 minutes. There should be a gray coating of ash on almost all of the briquettes.
- Spread the coals out evenly and replace the cooking grates.
Here’s the good news… there really are only three temperatures with which you must be concerned – hot, medium, and low. Hot (over 400F) will rarely be used for more than just a couple of minutes (mostly to sear meat). Medium (300F-400F) is the temperature at which you will cook most of your food. Low (under 300F)is reserved mostly for larger cuts and/or fatty cuts. So how do you how hot your grill is? Naturally, the best way is to have a thermometer. If your grill has one, you are a step ahead. If not, you could purchase an oven thermometer and get the same effect. In the absence of any thermometer try holding your hand six inches above the grill surface. If you can keep it there:
- 3 seconds – grill is about 500˚F (260˚C).
- 5 seconds – grill is about 400˚F (204˚C).
- 8 seconds – grill is about 300˚F (177˚C).
Tools/supplies you should have on hand:
- Tongs
- Spatula
- Basting brush
- Spray bottle with water
- Wire brush
- Skewers
- Oven mitts
- Salt and Pepper
- Cooking oil
Other things to consider:
- Always use the freshest ingredients available.
- Have a small table nearby to stage foods and hold supplies.
- Follow food safety rules. Be sure to keep work surfaces clean.
- Complete the majority (if not all) prep work in the controlled environment of your kitchen before taking food to the grill.
- If you discover the grill is too hot when you place food on it, remove it and wait for the grill to cool a little.
- Brush the grill with oil before cooking and don’t forget to brush the meat routinely while cooking.
- Do not press meat. This is unnecessary and will likely cause undesirable results.
- Salt your meat after cooking. Doing so during the process may cause the meat to dry out (exception is burgers).
- Keep your spray bottle of water handy to squirt out any flare-ups.
- Always clean your grill after use.
- If you are a gas griller, keep an extra propane tank on hand.
- Baste less often for a smokier flavor, more often for less smoky flavor (the moisture blocks out the smoke).
- Try to flip your food only once. The first side should cook about 40% of your desired doneness.
- It is crucial that you get to the gray ash stage before cooking food. Otherwise, you may get food that tastes like kerosene.
- Many people swear by the pre-soaked charcoal. I prefer to apply my own lighter fluid and know that it is all burned off.
- It may be common sense, but NEVER, NEVER, NEVER apply lighter fluid to open flame. If you follow the guidelines above it should be unnecessary and it is EXTREMELY dangerous.
This is a basic list. If you have other tips and tricks, please comment after the post. We will share those and recipes for barbecue sauces and rubs soon. Until then…