Ah, the lure of chocolate! How can this magical food be? Food, treat, mood enhancer… I often wonder about food and how it came to be. Who, for example, first decided it would be a good idea to crack open the football-shaped pod of a cacao tree, dig out the insides and let it ferment before grinding the bean and steeping in water to make hot chocolate? I can’t imagine being that resourceful on my own, but I am so thankful for that guy!
If you have been following along for a while now, you know how much I love treats. Many of you have even heard a rumor that I would soon be opening a bakery (psst… it’s true). While I enjoy treats of just about every kind, there are few that compare to any made with chocolate. You will inevitably find lots of chocolate in future posts on this blog, so I thought it might be time for a little chocolate primer. Here we go…
What you should know :
There are three “players” in the chocolate game – the cacao farmer, the chocolate maker, and the chocolatier. The cacao farmer grows, cleans, dries, and ships the cacao beans. The chocolate maker adds ingredients and processes to refine the cacao beans into chocolate. The chocolatier then turns the chocolate into candies, truffles, and other finished products.
The process goes something like this…
The beans are grown on plantations around the world but all within 15 – 20 degrees north and south of the equator. They are harvested twice a year. Once harvested, the pods are opened and the contents are scooped out and left to ferment. This is when the flavor really develops. The fermented beans are cleaned and dried (often in the sun). The cacao farmer then ships the beans to a chocolate maker who roasts the beans to further develop the flavor and loosen the nib of the bean from the hull. The hulls are removed from the nibs through cracking and winnowing. Next, the hulls are milled into a paste. This paste is called chocolate liquor. It is approximately half cocoa butter and half cocoa solids. Further refining is performed by adding sweeteners and other ingredients and running through a refining machine to make the particles smaller. Even more refining is accomplished through a process called conching wherein a heated machine smoothes out the particles even more and removes any bitter or sour flavors. Tempering is performed based on the desired end product. The chocolate is then shipped off to chocolatiers to make treats, etc.
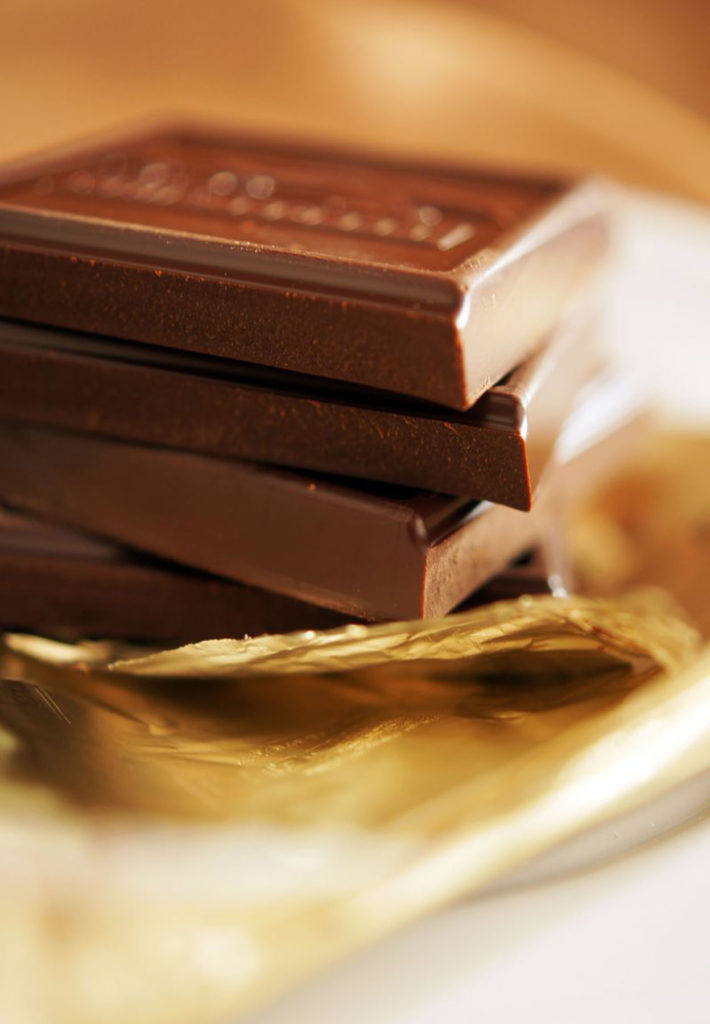
If you just want to eat it out of the package, I understand. Many people compare fine chocolates to wine, cheese, and cigars. There is a real art to tasting chocolate and getting the most out of the experience. I’m afraid I am not that complex. I am much more like Charlie Bucket and the result is more often foil shreds and a milk chocolate smile from ear to ear. But here is what the experts are considering – Appearance, Aroma, Break (how it snaps), Melt, Taste (bitter, sweet,salty), Aftertaste, Texture, and Roundness (flavor profiles and depth)
savour… golden tickets
There are several types of chocolate. Unsweetened is primarily used for baking. It is meant to be sweetened with the other ingredients in the recipe. Bittersweet is dark chocolate and has very little sugar. This is good to use in recipes where chocolate is meant to be the standout flavor among other strong flavors. Semisweet chocolate is among the most popular chocolates. The more well-rounded flavors make it a good choice for many recipes. Milk chocolate is created by adding dehydrated milk to the chocolate mix along with other ingredients. The result is a sweeter chocolate that is not used as often in baking but routinely used in treats. Cocoa powder comes in two types, Dutch-processed and natural. For the recipes in this blog, Dutch-processed will always be used. I will mention white chocolate only to say that it really isn’t chocolate at all. This is made up mostly of cocoa butter. There are no cocoa solids involved here, but it does get inserted into many chocolate conversations.
More things to know:
Melted dipping chocolate often calls for adding shortening. The shortening provides a smoother consistency and gives you a more evenly coated finish. Follow this simple rule: 1/2 teaspoon for every ounce of chocolate. Butter or margarine are not suitable substitutes because their moisture content will produce bad results.
Storing chocolate should ideally be done at 55 to 65 degrees in a cool, dark place. Refrigeration is not recommended as it may cause blooming (cocoa butter starts to separate from the chocolate) If your chocolate does begin to bloom don’t worry. It is still edible…just not pretty. Try to have as little air (and ZERO moisture) in your sealed chocolate storage as possible. Under ideal conditions, dark chocolate should last 18 months, milk chocolate 12 months.
When melting chocolate be sure to do so over low heat. It doesn’t take much to get chocolate to melt. However, the difference of just a few degrees can alter the taste dramatically. Go slow..and avoid wooden spoons. They may have some moisture in/on them. Moisture is a critical issue where chocolate is concerned. It can cause your chocolate to seize and bring your project to a screeching halt.
Chips and chunks are typically designed to hold their shape. For that reason, they are not a good substitute when a recipe calls for chopped bittersweet or semisweet chocolate.
Percentages on packages refer to the percentage of the chocolate that comes from the cacao beans. Typically the darker the chocolate, the higher the percentage.
There are many newcomers to the chocolate arena. You may wish to try some to get new perspectives. If you seek tried and true, some names to look for are Valrhona, Callebaut, Guittard, Ghiradelli, and Lindt. Of course, you can use another brand. These are just a few that are known for their quality.
You probably already have many, if not all, of the necessary chocolate tools. Here is a short list of essentials for working with chocolate:
- silicone or rubber spatula
- wire whisk
- metal saucepan w/heat-proof glass bowl or
- double boiler
- chocolate thermometer (more precise 1-degree increments)
- serrated knife and cutting board
Chocolate plays a part of nearly everyone’s life. Whether you cook with it, bake it, dip in it, or eat it as is, most of us cannot deny its magnetism. Please share this basic chocolate primer and refer to it as needed (especially as we bake together). Post your questions and comments at the end. Until next time…