
A few months ago a dear friend of mine told me she had an old settee that she was tossing. Thankfully, she gave me an opportunity to see it before she did because I instantly loved it. I could see that the basic shape was going to be lovely when covered in something other than burnt orange vinyl. I graciously snapped it up and threw it in the back of the jeep.
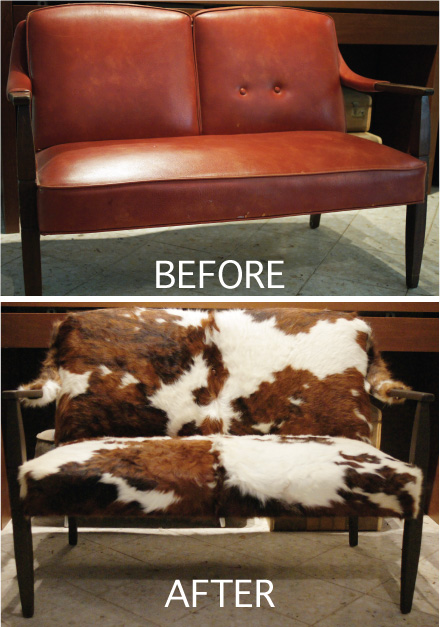
Coincidently, I had been looking at cowhides online and had a chair that I had considered reupholstering. After I got the settee home I knew that cowhide was the way to go. I put my nimble keyboard fingers to work on eBay and won an auction for a beautiful, very large cowhide. I paid $200 for it. It was worth every penny. The hide provided enough material to recover the settee and enough scraps to make a very cool rug (details on that in another post).
savour… one man’s trash
SETTEE MAKEOVER
Other than the hide, I had no out of pocket expense. I stripped and re-stained the legs with materials I already had. The skeleton of the chair was in very good condition. I only had to tighten a few screws. I was able to reuse the original metal tack strip, and the foam and batting were also in good shape.
This re-upholstery project was easier than many because there was no sewing involved. The thickness of the cowhide makes it tricky to sew. I decided instead to make cuts and folds to yield a tailored look.
You may have a chair right now that you would like to recover (you might be sitting in it). Go for it! If it reaches beyond your current skill set you might want to look for some further instruction online. You may feel free to contact me with any questions. Of course, your local library will likely have many books on the subject. If you want to be able to tackle more complex projects I highly recommend attending an upholstery class. You will find them offered by larger craft stores, fabric stores, and even some city community centers.
Before you start:
The best thing I can tell you is to always take notes. Write down everything you do in the order you do it.
Save the pieces of fabric you remove as intact as possible. If you aren’t changing the design you will use them as your pattern.
Mark the old cut with its location on the piece of furniture. This will save you much headache later.
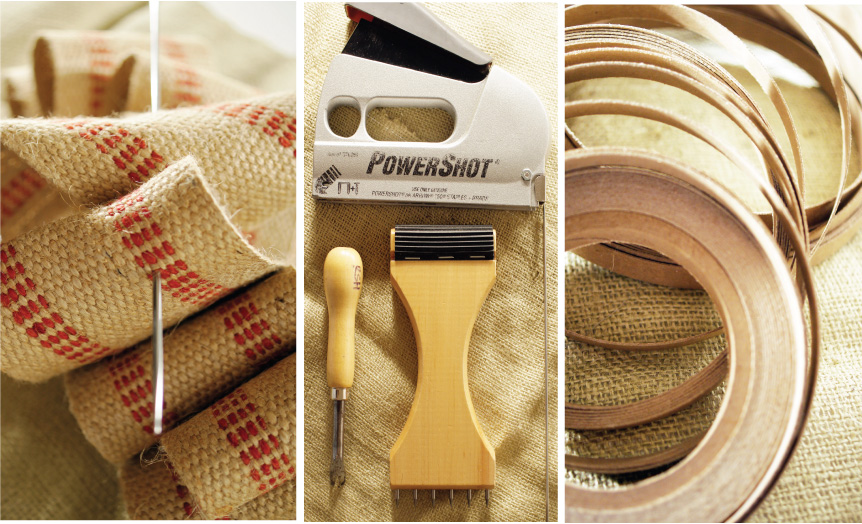
Use the right staples.
Have the right tools
- Staple gun
- Staple/nail remover
- Hammer
- Upholstery needles
- Scissors
Buy the right fabric. Most fabrics can be reinforced to be sturdy enough for upholstery, but if it is your first project, I would cut that step and just buy upholstery grade fabric.
Buy the right amount of fabric. Measure the pieces out that you remove. Most bolts of upholstery fabric come 54″ wide. Be careful that the grain of the fabric pieces flow in the direction you wish. Lastly, buy a little more than you need.
Save the old pieces until you are done (just in case you need to see how something “fit” before).
Save any pieces that can be reused (sometimes foam or batting, tack strips, etc.)


