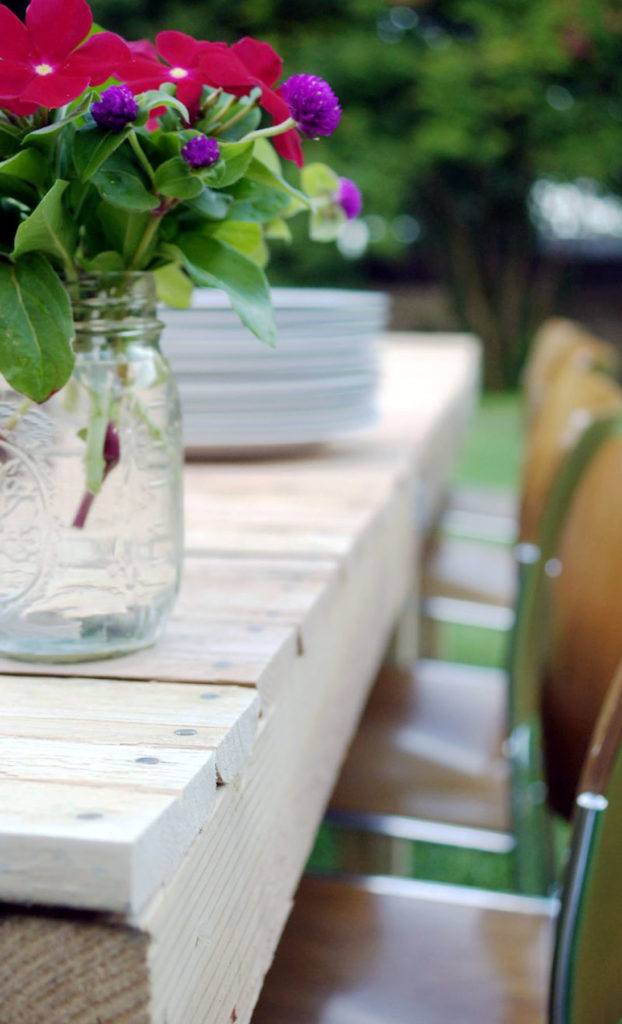
I love a long table. With it comes the notion of a dozen friends enjoying a wonderful meal, good drink, and lots of laughs. We are hosting a dessert party later this month, so I was tasked with producing an inexpensive solution for a table. We have a few smaller tables that we could put together, but nothing makes me happier than a good challenge. I submit the 10-foot table under $20.
I made this table out of discarded pallets, hardware from my embarrassingly large collection of whatnots, and $20 worth of supplies from the home improvement center. The result is a sturdy, rustic table that seats 10-12.
Part of what makes this such a great project is that because of its rustic nature you could make a few minor mistakes and nobody would really know… or care (perfect DIY project). Also, by leaving very small spaces between each slat, this table is very well suited to be outdoors. The rain runs right through it. Lastly, the most satisfying aspect of this project is that these palettes were on their way to the dump. Now we can use this table to fill our tummies instead of a landfill.
savour… dinner in the twilight
PALLET PATIO TABLE
Before you start:
Collect more pallets than you think you will need. Some of the slats will break during deconstruction. If you have some left over, save them for another project. For the example, I used approximately 7 pallets.
When disassembling and separating pieces into piles keep in mind that some may be salvageable. You may be cutting off the ends of the slats removing any splits that have occurred.
When attaching the braces you might find it helpful to drill pilot holes first. This will make screw-driving much easier.
Be careful when attaching the slats to the new frame. The pallet slats are likely to be very dry and will split on the ends. I cannot stress enough the importance of drilling pilot holes.
For stability and strength, add wood glue where any joint is formed.
This project took me a full afternoon by myself for construction. With a helper, it could be done in a few hours. It is well worth every minute spent.
Materials:
- Pallets – quantity depends on the size of your table.
- 2 1/2 inch wood screws
- 1 1/2 inch wood screws
- braces
- L brackets
- 2 inch nails
- varnish or paint
Tools:
- Work Gloves
- Hammer
- Drill
- Screwdriver
- Sander (optional, but recommended)
- Saw (table saw would be best)
- Paint brushes

The method:
- Disassemble pallets. Make 3 piles (good slats, good 2×4’s, scraps)
- Remove all nails and discard.
- Lay out 2×4’s to make a frame for the tabletop. For the example, we put 3 end to end to form the sides. One went in between the two sides on each end. 3 more made up the middle runner for stability.
- Lay out slats on top of the 2×4 frame to determine the number needed.
- Remove slats and set aside.
- On a flat surface use braces and 1 1/2 wood screws to connect 2×4’s to make up the sides of the frame. Attach inside and outside.
- Using the 2 1/2 inch wood screws attach the sides of the frame to the ends of the frame. Drill pilot holes as necessary.
- Measure from outside edge to outside edge. This will be the new length of your slats.
- Measure your slats and subtract the outside edge to outside edge measurement. This is how much you will need to trim away.
- Divide that number by two. Trim that amount from each side. This should leave the nail holes that were in the center… in the center. For the example, we trimmed away 2 1/2 inches from each side which removed any splits and rough-looking ends.
- Attach the slats to the tabletop frame with nails.
- Turn the tabletop over, face down.
- Cut two 2×4’s for each leg you need (due to the length of our table, I made 6 legs). The legs should be the desired tabletop height (usually around 30 inches) minus 1 inch.
- Run a small amount of wood glue down one 2×4 and screw two 2×4’s together for each leg.
- In the corners attach the legs by screwing 2 1/2 wood screws from both sides.
- In the middle (if applicable) attach the legs by screwing 2 1/2 wood screws through the side and into the leg and also place an L bracket on either side of the leg for stability.
- Turn the table upright.
- Sand as needed.
- Paint or varnish as desired.