I love the notion of sitting on the patio with a tall glass of sangria in the summer. Creating an outdoor space that you love to visit makes all the difference. Today we tackle a table that just about anybody can make. Best of all, it’s almost free. It will require a bit of work and you may want to enlist some help, but the overall result is perfect for a carefree patio.
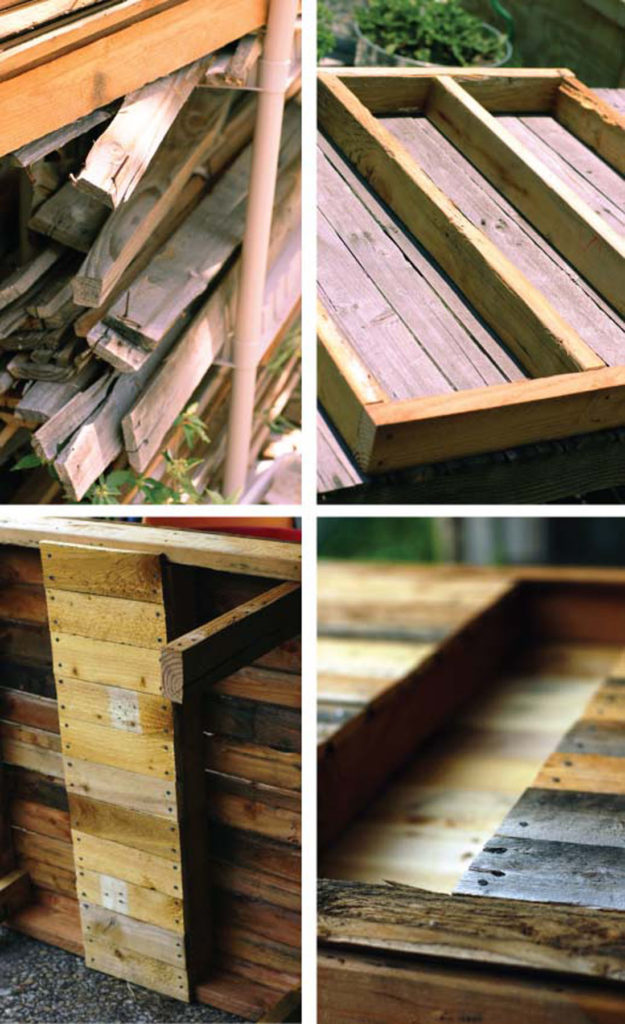
This isn’t the first time we’ve used pallets for building materials around here. You may remember the patio farm table we built or this fun butterfly art for inside. Using pallets provides plenty of material, keeps them out of landfills, and saves you loads of money. Keep in mind, none of these things are meant to be heirloom pieces, but they are practical and, if treated well, will last for years to come.
savour… cheap chic
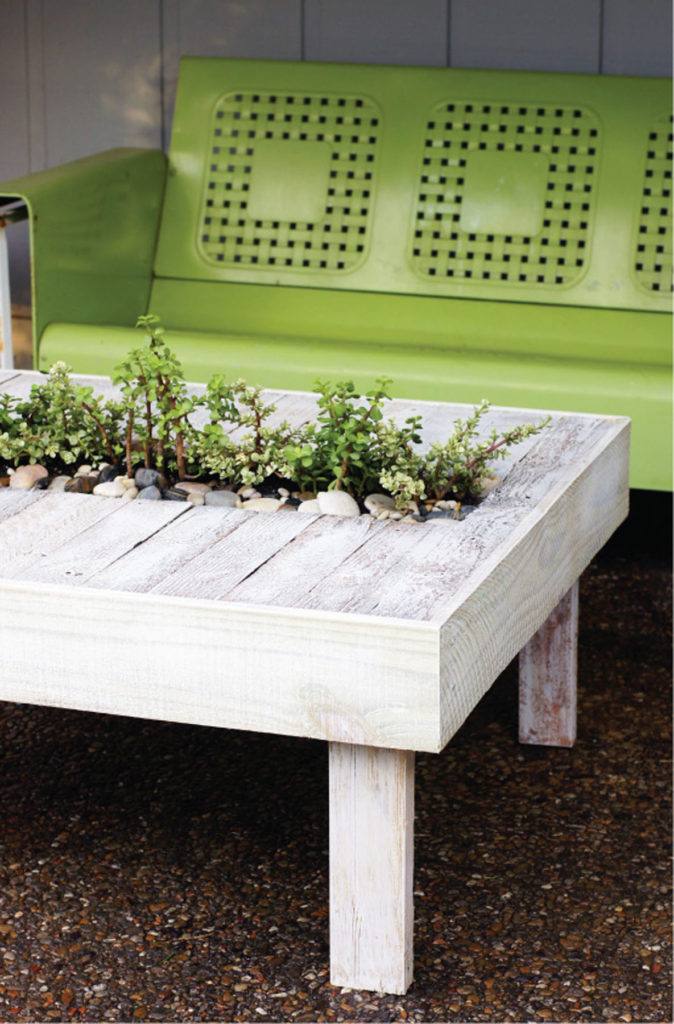
PATIO COCKTAIL TABLE
Before you start:
When cutting the pallet pieces look for the best parts of the pallet. Some of the pieces will have to be discarded as they may get damaged (if not already) during the breakdown process.
It is likely that the pallets will be dirty. You may want to scrub them a bit or hose them off at the very least before beginning.
The 18” lengths are for the legs and should be as straight as possible.
Be sure to turn over your table and check the legs to see if they are leaning in or out too far. You may have to replace them and now is the time to do it before you put the frame around the outside.
It may actually take less than 12 pallet slat pieces to finish each portion, but it shouldn’t take more. This will depend on the width of the pallet slats you find.
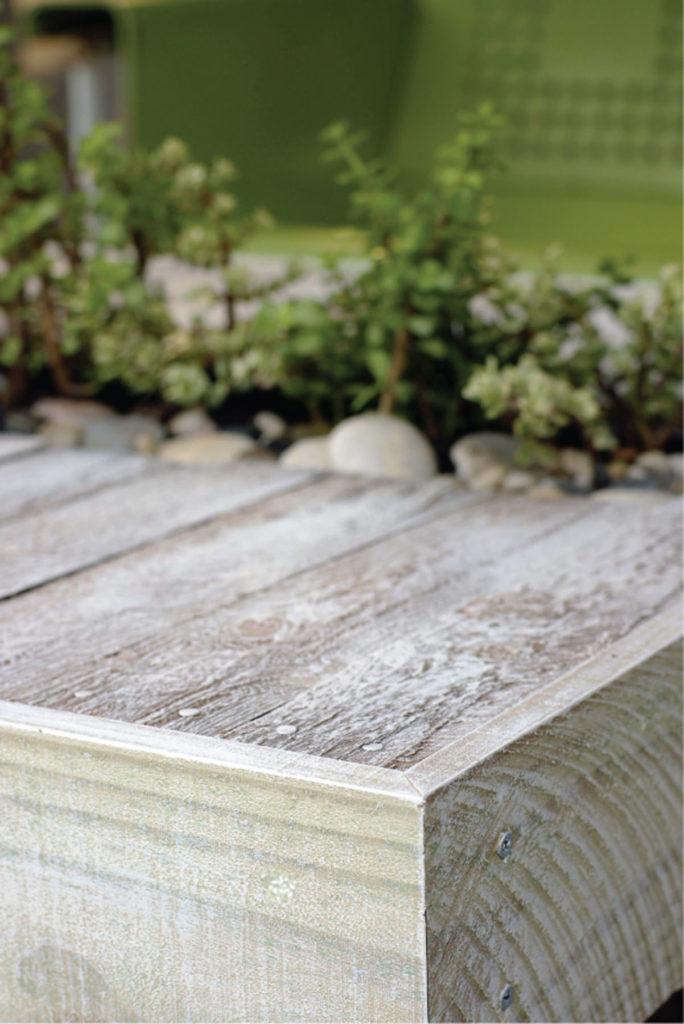
When you sand and paint the project, go against the grain. There will be very few other projects found here with this instruction, but I promise it makes a difference. The idea here is to produce ridges and valleys for a bit of a rough-hewn look. Do not sand too much as it is not meant to be smooth.
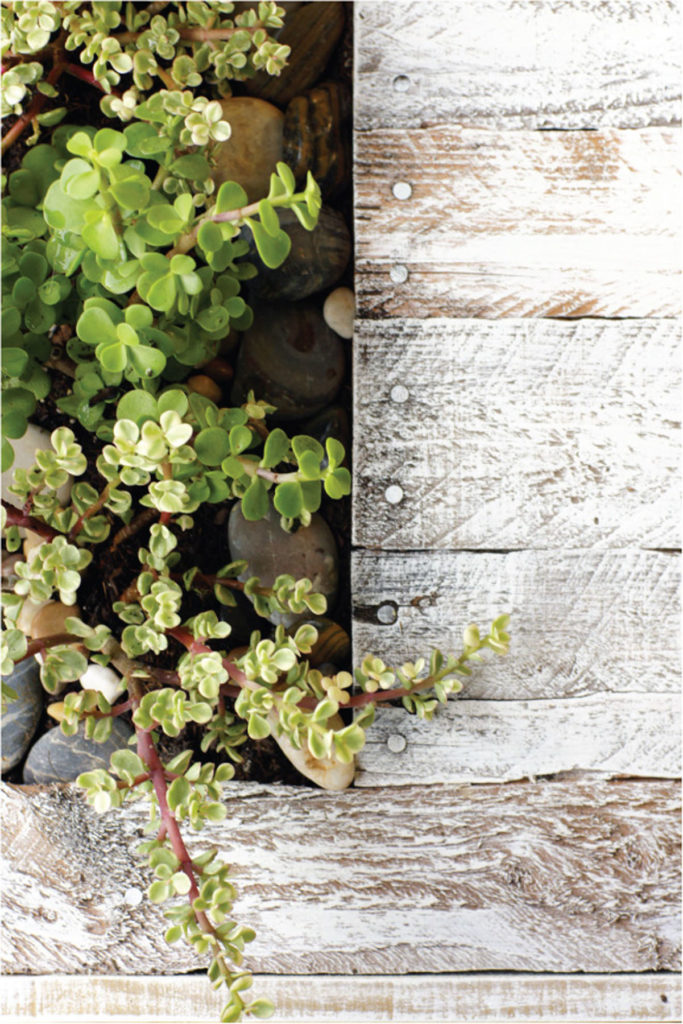
The channel can be used for many things from planting to icing down drinks. You may want to line with heavy plastic sheeting to protect the wood a bit.
The materials:
- Several discarded pallets
- Sander and sandpaper
- Hammer
- Drill
- 3-inch wood screws
- Nails
- Saw
- 2 5/8”x5”x8’ fence pickets
- Latex paint
- Paintbrush
- Clear satin sealant spray
- Tape measure
- Pencil
- Wood glue (optional)
The method:
- Break down pallets and remove any nails.
- Cut 2x4s from the pallets into 4 usable, 18” lengths
- Cut 6 of the 2x4s from the pallets into 36” lengths
- Cut (24) 14” lengths from the pallet slats.
- Cut (12) 11” lengths from the pallet slats.
- On two of the 36” lengths, mark a line at 14” and 22”.
- Assemble the frame on a flat surface with the top down by placing the 4 remaining 36” lengths between the two you just marked. Two of them will be lined up at the marks you made on the outside of the marks to create an 8” space between. The other two will be flush with the ends of the marked 36” lengths.
- Using wood screws attach the marked lengths to those arranged in between.
- Attach the legs to the corners using wood screws on either side of the ‘L’. This should be done from the outside in.
- Arrange the 11” pieces to cover the 8” space you made between the two center 2x4s. Be sure to leave just a little space between each for drainage. I recommend pre-drilling the holes to avoid splitting the ends.
- Turn the table over and lay out the 14” pieces to cover the two outside channels. Start at either end and work toward the center. The outside edges should be flush with the frame. If the space at the center is smaller than the width of one of the 14” lengths, cut it lengthwise to fit. Move pieces around to make sure the small piece is in the same spot on both sides (see photo).
- Attach the 14” lengths with nails.
- Cut the fence pickets with a miter edge to make a frame around the outside of the table. There should be two with the inside edge of the miter cuts measuring 36” and two with the inside edge measuring 39”.
- Attach the frame around the outside of the table with nails or screws. Use wood glue on the sides and especially at the joint, if desired.
- Lightly sand the entire table. Wipe with a damp cloth to remove sawdust.
- Mix 2 parts latex paint with 1 part water.
- Dip the brush in the paint wash and then remove most of it.
- Lightly drag the brush with wash over the entire table in the opposite direction of the grain of the wood.
- Lightly sand any areas that you think may have gotten too much wash.
- Spray with a clear sealant.
- Dry completely before using it.