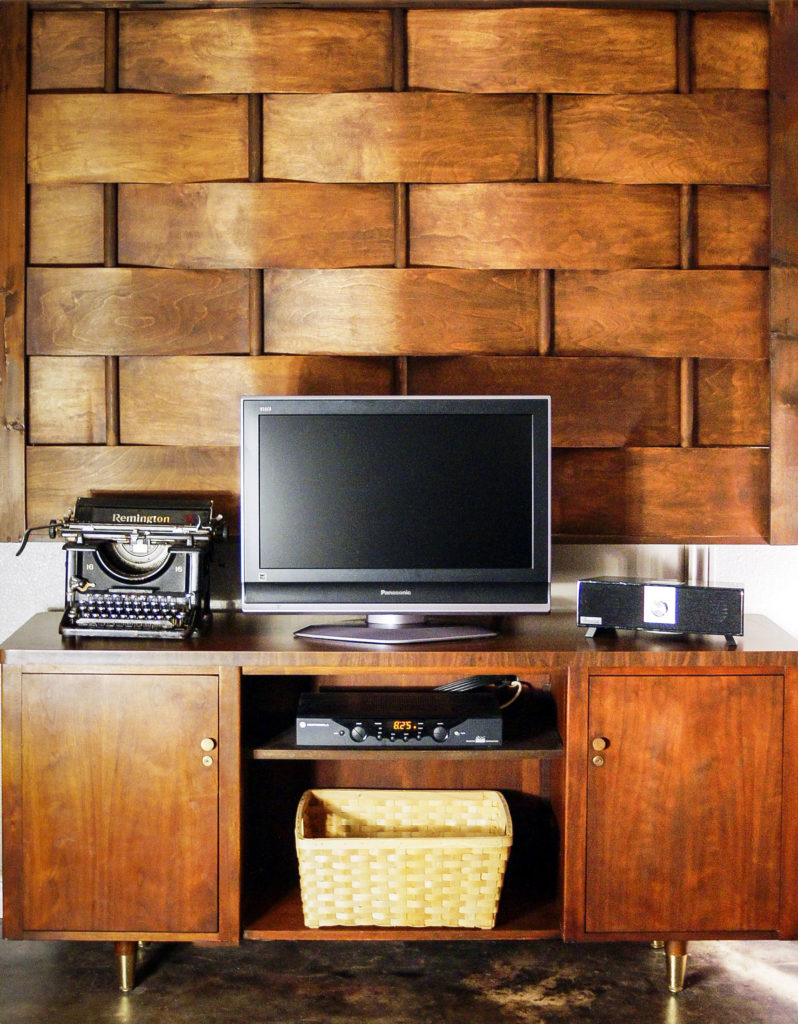
Our project today involves a little light woodworking. There is nothing too intense here. You could pull this off with minimal skills and some rather rudimentary tools. For your efforts, you will be rewarded with a very nice piece that can be used in a variety of settings. It can be used as a focal point or as a background to the overall scheme. I find this project perfect for apartment dwellers, particularly those who don’t have the ability to paint. This large piece will bring in some color, texture, and natural element without too much commitment.
For what you get, the cost of this project is very reasonable. There is, however, a time commitment. Glue will have to dry, etc. Do not expect to finish this project in an afternoon. Lastly, because it is somewhat tricky to manipulate by yourself, be sure to have a friend help when you get ready to assemble. When you’re finished you can make one for them.
savour… natural elements
BASKETWEAVE WALL HANGING
Before you start:
You should be able to find the dowels pre-cut at your local home improvement store. The 4 ft and 6 ft pine boards will also likely be pre-cut.
If you have a saw at home cut the remaining pieces or ask the home improvement center to cut them for you.
Pre-drill pilot holes if possible. This will prevent the wood from splitting.
Assembling the weave is a two-person job. Don’t even bother to try it alone.
You may choose to frame out the whole piece when done. These instructions do not include that.
This project is not difficult, but it is time-consuming. Complete it in stages.
The materials:
- 1 full sheet 1/4 inch plywood
- 2 – 1×2 pine boards 48 inches long
- 2 – 1×2 pine boards 72 inches long
- 2 – 1×3 pine boards 49.5 inches long
- 5 – 1 1/4 inch diameter dowels 48 inches long
- wood glue
- 1-inch wood screws
- 1 1/2 wood screws
- 6 hand clamps
- wood putty
- stain (if desired)
- varnish (if desired)
- rubber mallet
- screwdriver
- drill
The method:
- Have all pieces cut and ready to be assembled in an open area with plenty of floor space. Be sure to lightly sand the edges of the cut plywood strips.
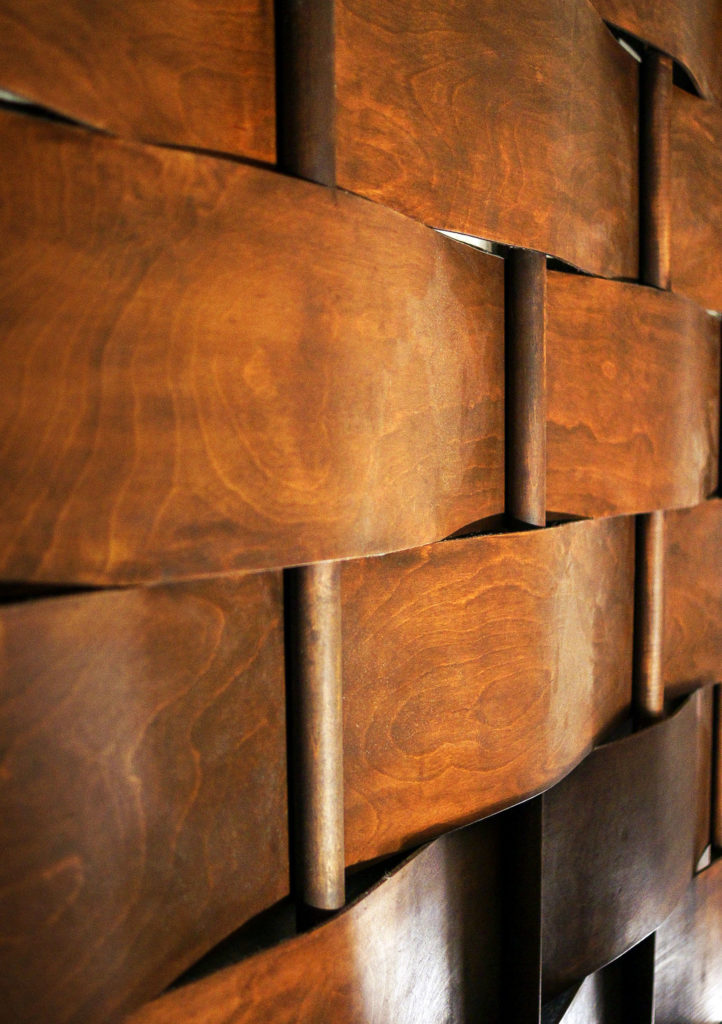
- Lay all of the strips together to form a 4′ x 6′ rectangle. Arrange them and flip them as you wish until you get the desired pattern. Don’t leave them in the same pattern they were when they were a whole sheet.
- Insert a 1″x2″x4′ board (widest side down) along the 4′ edge alternating one plywood strip under the board and the next plywood strip over the board.
- Apply a small amount of wood glue and clamp these in place with a hand clamp.
- Secure with a small wood screw… two for each strip.
- After sufficient drying time (based on your glue) begin the basket weave pattern by inserting the first dowel into the strips about 5 inches from the 1″x2″ board you have fastened. It should mimic the board with the strips going over or under in the very same way.
- Next insert the next dowel about 12 inches away but placing the strips in the opposite way. If it was under the last dowel, it goes over this dowel.
- Repeat with the next two dowels with approximately 12 inches between.
- The last dowel, when inserted, should have an excess of about 5 inches of strip leftover.
- Insert the other 1″x2″x4′ board in the same pattern as the last dowel.
- Apply a small amount of wood glue and attach the strips to the board with hand clamps.
- Secure with a small wood screw… two for each strip.
- Allow time for drying.
- When dry use mallet to adjust dowels spacing evenly.
- Stand entire piece up with dowel vertical and make sure they are evenly distributed left to right and top to bottom.
- With wood screws, attach 1″x2″x6′ board across the top and bottom of the piece (widest side of the board against the dowels). Attach at dowels and side boards.
- Attach 1″x3″x49.5″ board on both sides with wood screws to cover up loose ends.
- Putty over any screws and sand lightly.
- Sand any rough areas.
- Stain and/or varnish as desired.