Today we offer up two slow home kitchen tips. Both of these are very simple but will make your life infinitely easier and definitely tastier. They take a little time but can be done simultaneously to shave a few minutes off of the clock and save you time and money later.
When my wife was pregnant with our first son she ate loads of Mexican food and fruit… bowls and bowls of fruit. We bought fresh fruit, of course, but it wasn’t enough. We found bags of frozen mixed fruit and the coldness combined with the variety seemed to do the trick. The trouble was that it was often frozen in one giant clump.
These days we like to take advantage of what is in season, on sale, or growing in our garden so we still freeze what we can, but we do it in single layers. Freezing in single layers first means that nothing sticks together. This way you can measure out just what you need for your recipe and leave the rest in the freezer.
Here are a few things to consider:
- Wash the fruit thoroughly before starting
- Use parchment sheets for easy removal
- Have a sharp knife (learn more about knife sharpening)
- Use a baking sheet
- Seal in zip freezer bags after frozen

I find chopping to be therapeutic and it helps to practice my knife skills. This is also an excellent way to get the kids involved. If they are old enough you could let them do some cutting. If not, let them fill the sheets with the cut fruit or fill the storage bag when they are frozen. These are important skills to pass on.
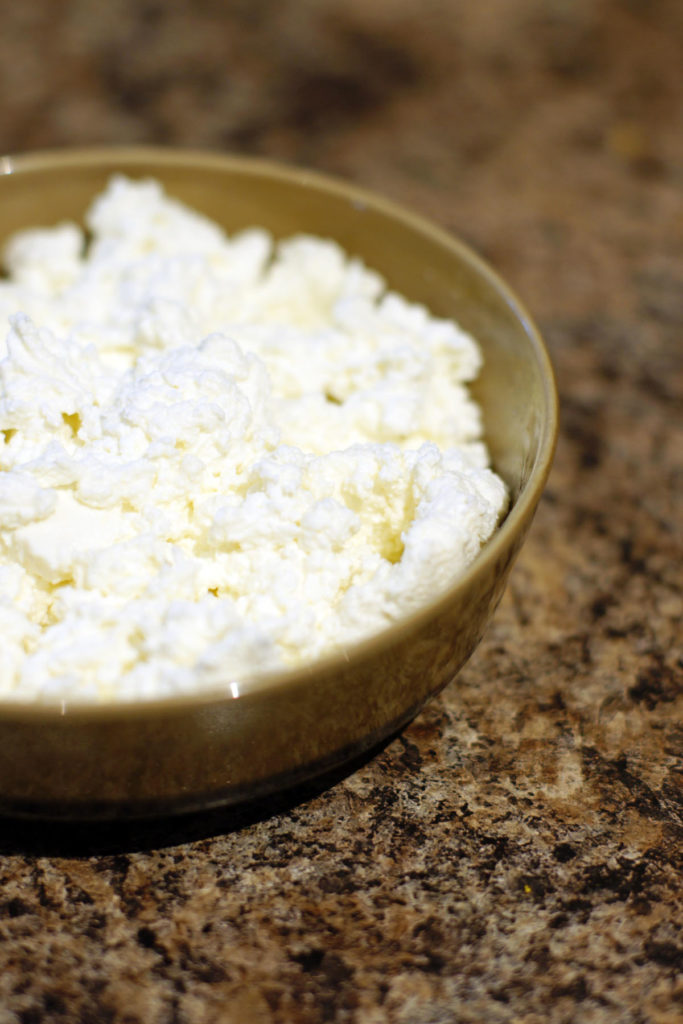
Now we move on to making your own ricotta. This is not new to the blogging world, but I do make mine a little differently than most. Ours uses low-fat or non-fat milk, cream, and non-fat Greek yogurt. The combination of the three cuts down dramatically on the fat content, but yields a very creamy and smooth cheese. In the picture below, we have simply paired it with fresh cut strawberries and a little honey. The freshness of the cheese served like this is perfection. If possible serve it while the cheese is still slightly warm.
You will find it easy to make and delicious for any recipe that calls for ricotta. One disclaimer: this isn’t really ricotta, but more like a farm cheese or home cheese (or variety of other names it gets called). The texture and taste are similar, but true ricotta uses leftover whey. What this product doesn’t have is a bunch of stabilizers that are packed into the store-bought version. What is does have is loads of flavor and should probably be used up within a few days. Don’t make this unless you intend to use it… or share it with someone.
We all live busy lives, but I challenge you to try a ‘from scratch’ meal at least once per week. This is a wonderful opportunity to get in touch with food and your family… experiment and learn how something works. Learn a new skill together or create traditions that will last a lifetime.
savour… slow food
HOMEMADE ‘RICOTTA’
Before you start:
The store-bought version will have more salt. You can add more if you wish, but starting here gives you a little more control. As is, it is perfect for sweet or savory dishes. You can always add more salt to your meal instead of the cheese if necessary.
This will be drier than the mass-produced product. You can increase the moisture content a little be draining for a shorter period of time. I would try it as is first to gauge the texture.
While I have never done it, I understand that some people save the liquid to make bread, make rice, or even as a soup starter.
The ingredients:
- 3 ¼ cups (26 ounces) 1% or non-fat milk
- 1 cup heavy cream
- ½ cup non-fat Greek yogurt
- 1 ½ teaspoons white vinegar
- ½ teaspoon salt
The method:
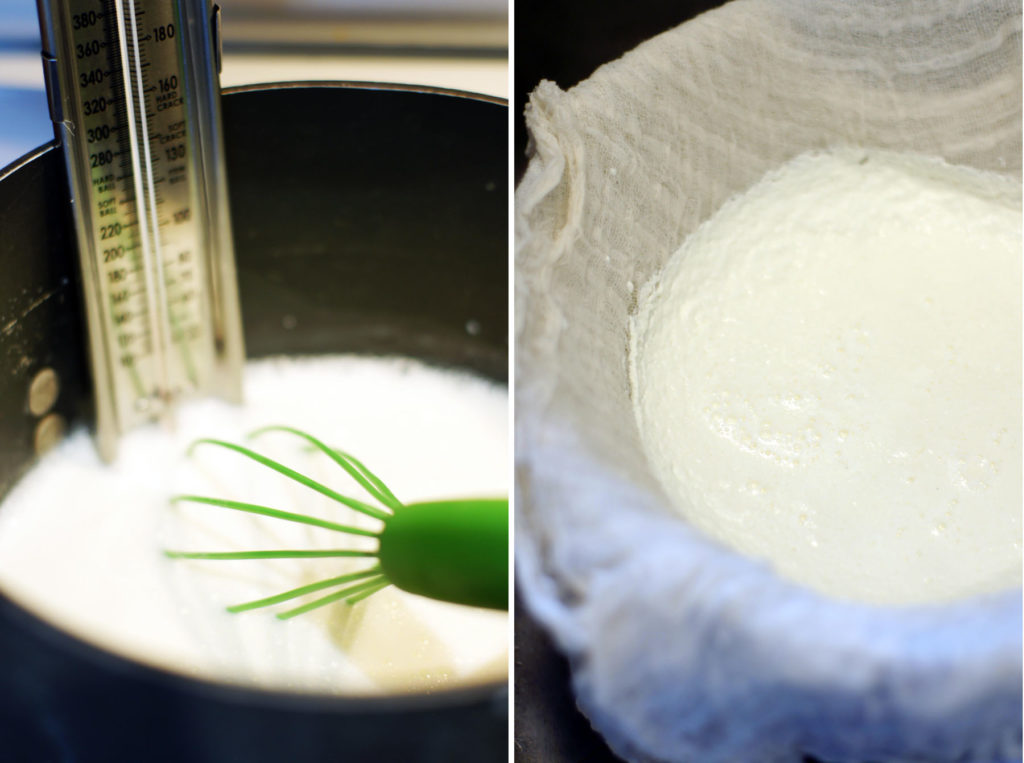
- Stir all ingredients together in a large pot over medium heat.
- Bring to a gentle boil and allow it to boil for about 2 minutes (you should see the milk curdling). The cook time will be around 20-25 minutes.
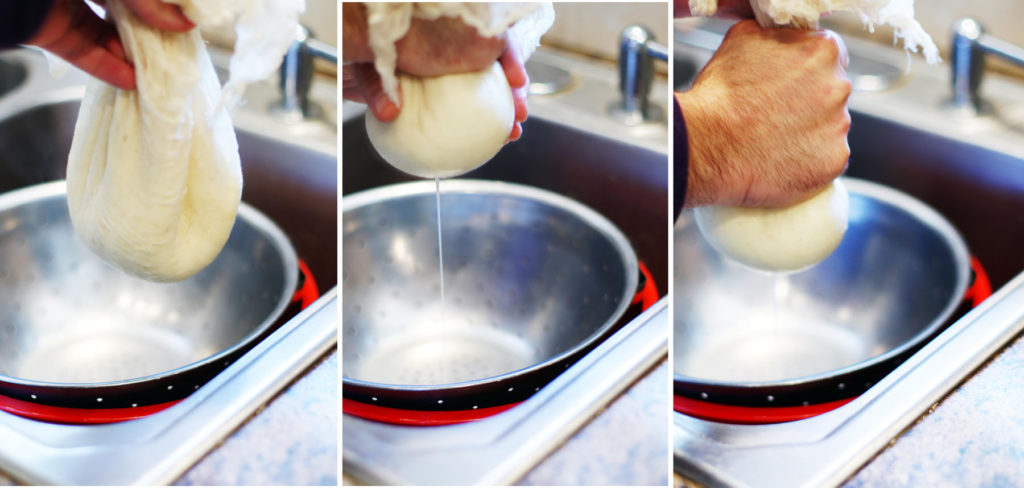
- While the mixture is cooking line a colander with a few layers of cheesecloth.
- Pour the mixture into the lined colander and let it drain for 12-15 minutes.
- Gather up the cheesecloth and gently squeeze out any excess moisture.