Brace yourself. It’s going to be a bumpy ride. This treat of the week is loaded… with deliciousness. There is nothing light about it, but it is eight bites of naughty heaven.
I know many of you are minding your intake of fried foods. I promise to bring you a baked doughnut in the future, but a little indulgence can be good if taken in moderation. This recipe yields a baker’s dozen plus some doughnut holes. Be prepared to give some away to get them out of the house. Make them… eat one… hide one for later… and then remove all evidence.
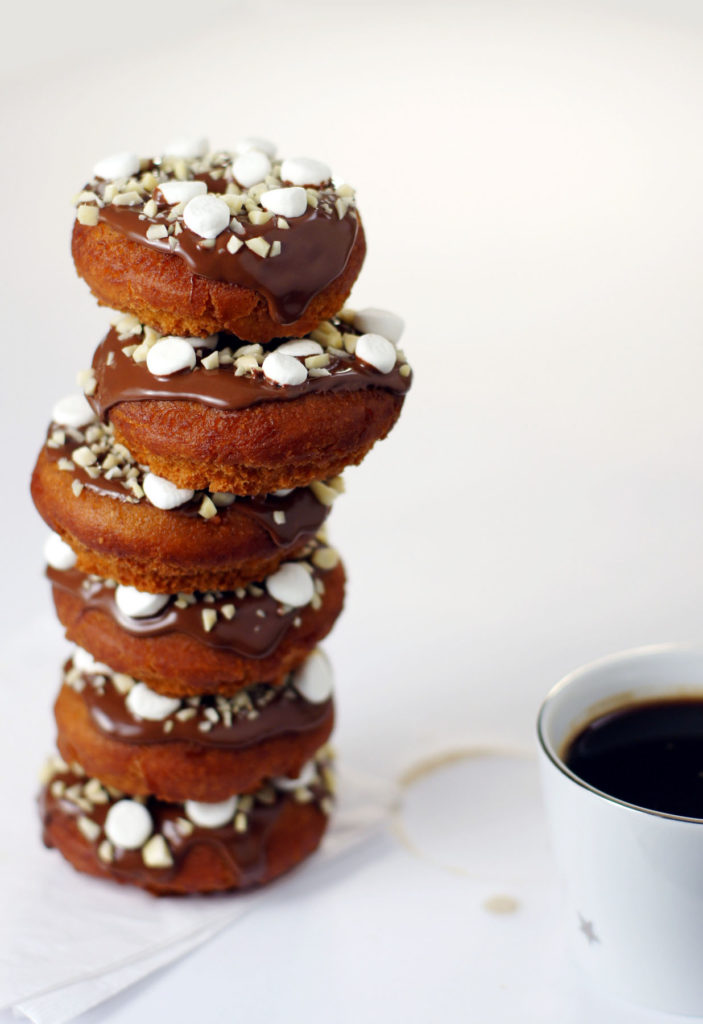
Yesterday was Rocky Road Day and today is National Doughnut Day. We took our cues from that to make today’s Treat of the Week. This doughnut is our basic cake doughnut recipe. We made it even more decadent by adding chocolate, nuts, and marshmallow. The result is sinfully good.
As a side note: Rocky Road is good in just about any form… even life. It is the rocks in the road that make us who we are. Even when the trail seems impassable, our strength and the support of those we hold close get us through. We must be fearless in life and view obstacles as opportunities. As my good friend once told me, “If you don’t like the view from where you stand, change your perspective.”
savour… the highway of life
ROCKY ROAD DOUGHNUTS
Before you start:
All ingredients should be at room temperature to start.
Do not over-mix. This will result in tough doughnuts.
Allowing the doughnuts to rest before frying will create a little crust on the outside which will fry better and reduce some of the fat in the finished product.
Keep your frying fat at a constant temperature.
For best results, slide your doughnut into the hot oil with a flat spatula that has been dipped in the hot oil.
Do not overcrowd your fryer. You may only be able to cook two or three at a time.
Your frying time may vary based on your preference. If you like your doughnuts a little less golden, try 1 minute per side. Any less than that may be undercooked.
We have used almonds for our rocky road, but you could certainly substitute a different nut if you prefer.
Be sure to drain on paper towels. It’s fried dough… it’s greasy.
The ingredients:
- 4 cups all purpose flour / 500g
- 4 teaspoons baking powder
- ¾ teaspoon ground cinnamon
- ½ teaspoon ground nutmeg
- ¾ teaspoon salt
- 2 eggs
- ¾ cup sugar (rounded) / 185g
- ¾ cup + a tablespoon buttermilk / 200mL
- 5 tablespoons butter, melted
- 1 cup chopped almonds
- 1 cup mini-marshmallows, halved
- melting chocolate for dipping

The method:
- Sift together all dry ingredients and whisk together to ensure they are fully blended.
- Beat eggs on medium-high speed until well beaten.
- Slowly add sugar and beat until thick and creamy.
- Turn mixer to lowest speed and add buttermilk and butter. Mix until blended.
- Pour liquid mixture over dry ingredients and mix with a spoon just until incorporated.
- Wrap dough in plastic wrap and place in the refrigerator for 3 hours or up to 24 hours.
- Remove dough from the refrigerator and separate it into two equal parts. Roll one part at a time ½ inch thick.
- Cut with a circle cutter and then form the doughnut hole with a smaller cutter.
- Place on a well-floured tray and allow them to rest for at least 20 minutes before frying.
- Heat oil in a pot or deep fryer to 375˚F.
- Fry each doughnut for 1.5 min on each side or until deep golden brown.
- Remove and place on a wire rack to drain.
- Store in an airtight container. Best if eaten within a couple of days.
- Dip doughnuts in melting chocolate and sprinkle with chopped almonds and mini-marshmallow halves.
Don’t forget the doughnut holes! Fry 8-10 at a time, making sure to not overcrowd the pan. Because of their size, these should only need to cook for a minute total. Stir them around a bit as they fry for even cooking.